While there are fewer options when you compile a project with Scrivener for iPad or iPhone, it's a quick, simple process.
Compile Scrivener Projects on iPad and iPhone | Literature and Latte
In recent articles about using Scrivener on iPad and iPhone, I've discussed the app's interface, explained how you can customize Scrivener on a mobile device, shown how to create and manage projects, and looked at how to sync projects between an iPhone or iPad and a computer. In this article, I will explain how you compile projects.
Compiling Scrivener projects is what you do when you want to move on to the next step: to send them to an editor or agent, or to a writing buddy, so someone can read your draft or finished work. Here's how to compile a Scrivener project on an iPad or iPhone.
About compiling
When you compile a Scrivener project, you export the project in a format that can be read in other software, or you print the project out. You may want to compile your project so you can proofread it on paper, or you may send it to someone who will read it with other software, such as Microsoft Word, or Final Draft, or even just as a PDF. See this article for the basics of compiling Scrivener projects on the desktop.
Compiling on an iPad or iPhone offers more limited options than on a Mac or PC, but the compile feature is still quite powerful.
How to compile your project on Scrivener for iPad or iPhone
If you're familiar with compiling Scrivener projects on a Mac or PC, you know that it can be a persnickety process, with lots of options. On an iPad or iPhone, it is much simpler. If you need more options, it's best to do so on the desktop, such as if you're compiling for an ebook format, but for most projects, the compile feature on iPad or iPhone is sufficient.
The process is quite simple: you choose a format for your project, then you choose an appearance, and then there are a few other settings that you may or may not want to adjust.
Tap your project in the Projects list, so you see its Binder. At the bottom of this screen is the Compile icon.
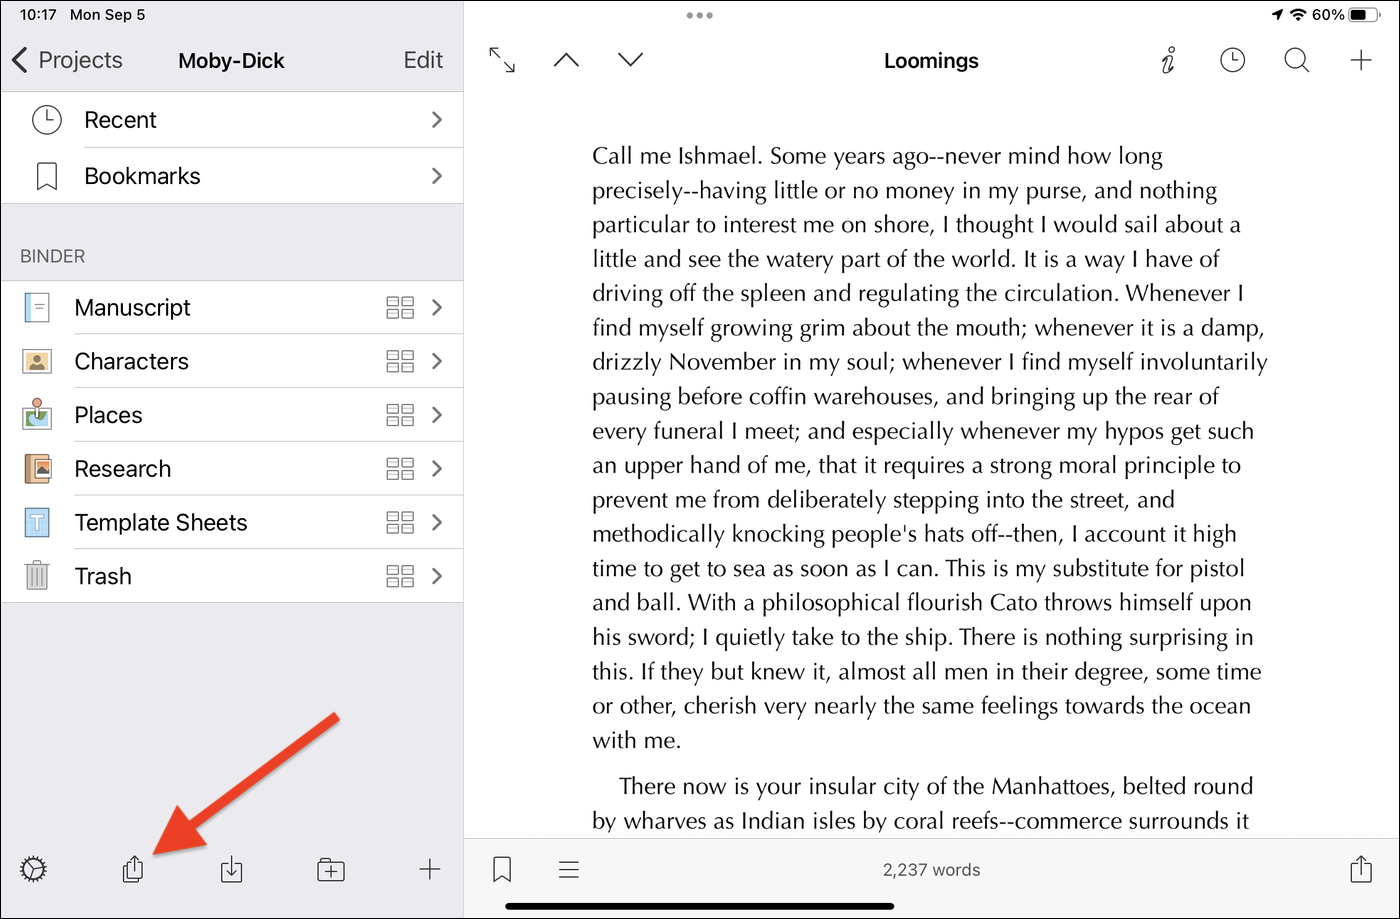
Tap this icon to bring up the Compile screen.
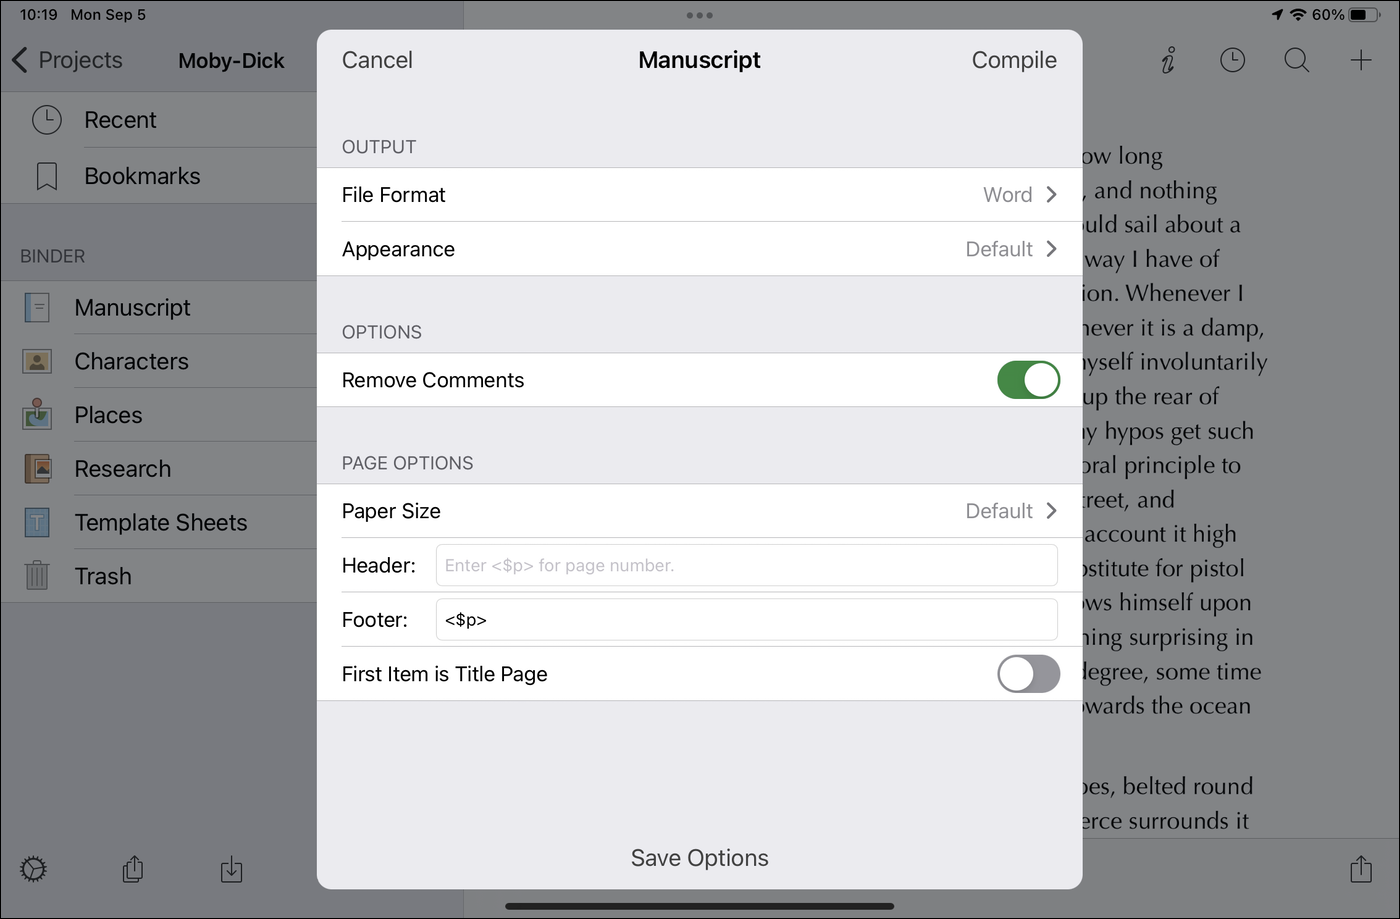
The first option is the File Format. By default, this is set to Word, but you can also choose PDF, RTF, Plain Text, or Final Draft. Tap File Format to change this if you want. (If you want to print out your project, choose PDF, save the PDF, then print it. )
Next is Appearance. Scrivener for iPad and iPhone offers five appearance presets. Each of these applies certain formatting options to your text, and may also add titles to sections, and page breaks or separator characters between the files. There is also an appearance named Default, which outputs text exactly as it looks in the editor with an empty line between each file and a page break before any folders.
The five appearances are:
- Manuscript (Courier)
- Manuscript (Times)
- Modern
- Palatino Book
- Script
The first three appearances mirror compile formats available in Scrivener for Mac or Windows. The first two Manuscript formats conform to common industry standards in terms of manuscript submission and working with agents and editors, using either the monospace Courier font or the proportional Times font.
The Modern appearance uses Avenir Book with Helvetica Neue headings, and has a more modern look, which makes an attractive printout. And the Palatino Book appearance uses a font that is easy to read when printed. Finally, use the Script appearance if you've been writing a script or screenplay; it formats everything in Courier, with the appropriate spacing.
After you've chosen a File Format and Appearance, select other options. The paper size is important if you're planning to print the project or share it. By default, Remove Comments is enabled, but if you want to leave comments in the final, compiled document, disable this. The default options for header and footer display the page number in the footer; if you would rather have page numbers in the header, type <$p> in the Header section, and erase that text in the Footer section. Finally, enable First Item is Title Page if you have a document at the top of your Binder that is intended to be the title page of your project. When you've set your options, you can save them for future compiles by tapping Save Options.
Tap Compile to compile your project. Scrivener collects all the elements in your project and displays this screen. You can see what it looks like; sort of.
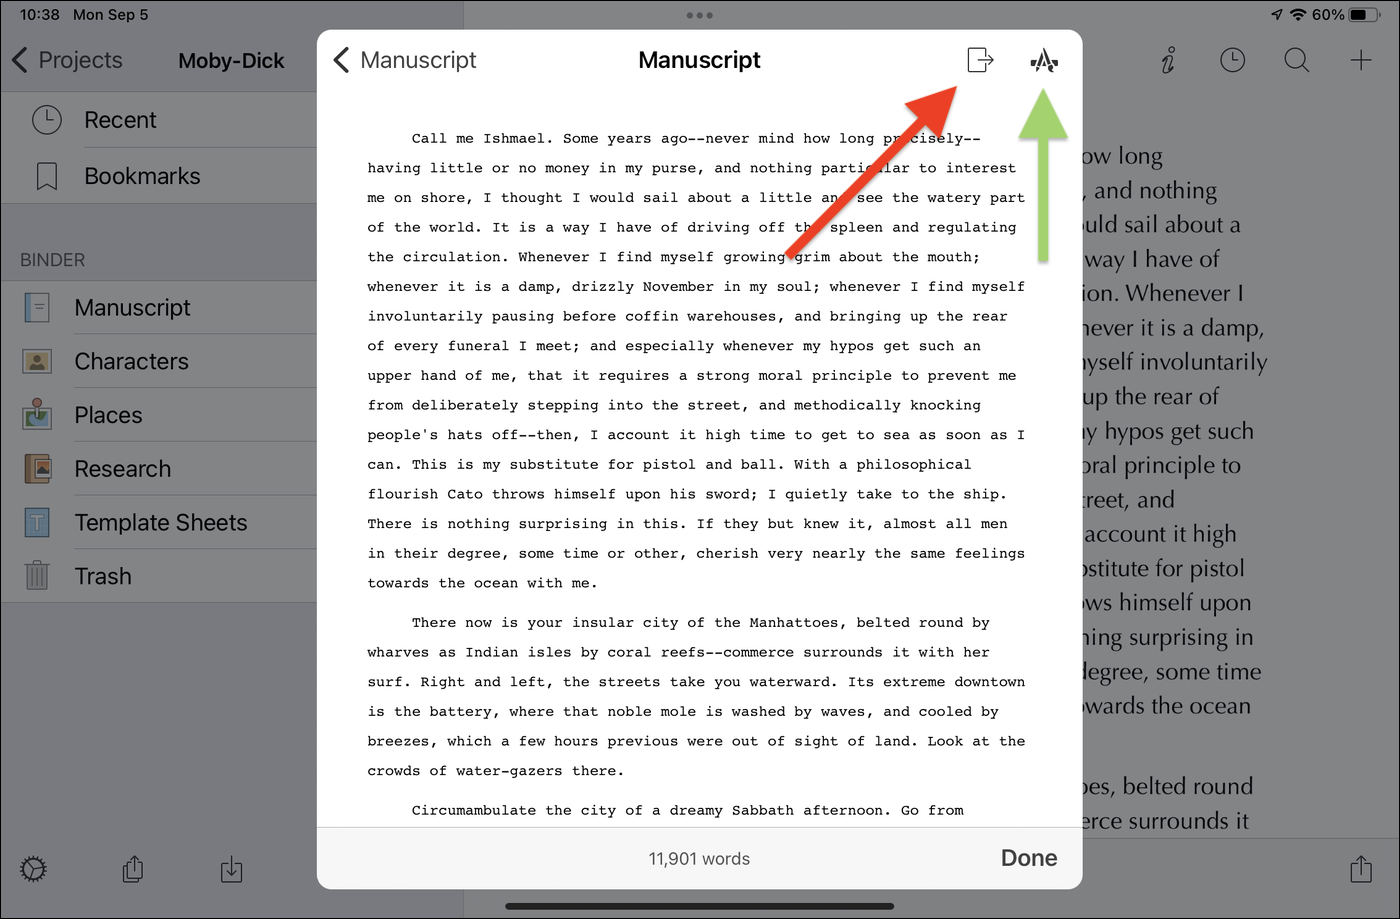
Now, you have two options. You can save the compiled document or open it in another application. For the former, click the Share icon (red arrow); for the latter, click the Application icon (green arrow). If you tap the Share icon, you can send your compiled project by email, save it to another app, or save it to Dropbox, iCloud Drive, or another cloud service. With the Application icon, you can open it in a different app; available options depend on which apps are available and the format of the compiled document, but may include apps such as Pages, a text editor, or another app that can read documents in the compiled format.
Note that Scrivener displays the word count of the compiled document at the bottom of this screen. It can be useful to use the Compile feature to check your word count as you're writing; just tap Done to go back to your project.
Customizing appearances for compiling
As I explained above, there are five preset appearances, but Scrivener is very flexible, and allows you to customize appearances. This involves creating your own appearance templates, which are text files that you can edit to tweak the way your documents compile. You can change the font, set margins, add page breaks before folders, and much more. See Customising Compile Settings on iOS to learn how to do this.
Compiling with Scrivener for iPad or iPhone is more limited than what is available on the desktop, but it is also a lot simpler. If you need to create a quick PDF, or even a final Word document to share with someone, a few taps and it's done. And if you want more options, you can adjust appearances with a few simple tweaks.
Kirk McElhearn is a writer, podcaster, and photographer. He is the author of Take Control of Scrivener, and host of the podcast Write Now with Scrivener.