Scrivener's Collections are a powerful feature that leverage the Binder and project search to help you manage your projects.
How to Use Scrivener's Collections to Access Groups of Files or Search Results Quickly
Scrivener's Binder lets you organize the elements of your writing project in folders and files. Folders generally represent chapters, and files can either be complete chapters or scenes. You may have a lot of files in your Scrivener project, and sometimes you want to access certain groups of files together, instead of individually in folders.
Collections let you organize files in two ways. Standard Collections let you make ad hoc groups of files, and Saved Search Collections let you save the results of searches for specific terms in your project, and go back to them at any time.
Here's how to use Collections in Scrivener projects.
What are Collections?
Standard Collections are simply lists of files in your project. You can add, rearrange, and remove files from collections as you write. You may want to create collections for scenes with specific characters, from specific points of view, scenes that take place at specific times (such as the present and flashbacks), are set in specific locations, or any other variable that you want to use.
A Saved Search Collection is like a bookmark to a search that you've performed in your Scrivener project. Let's say you want to search for a character name; as you progress in your project, you may want to do that often. Saving the search as a Collection can save you time, as the Saved Search Collection is constantly updated.
Using Standard Collections
Standard Collections are lists of files that you set up. They act sort of like aliases or shortcuts to the original files; when you display the collection, you see all the files it contains, and clicking one displays that file's contents.
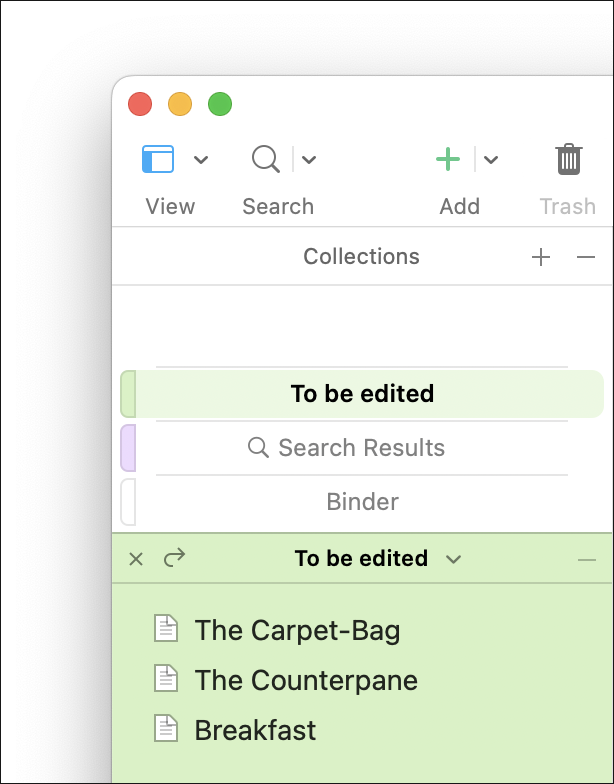
To create a Standard Collection, start by choosing View > Show Collections. Click the + icon at the top of the sidebar, then name your collection.

There are several ways you can add items to the collection:
- Click Binder in the Collections view, then drag files onto the name of the Collection
- Right-click a file, then choose Add to Collection > Collection name
- Select a file in the Binder, then choose Documents > Add to Collection > Collection name
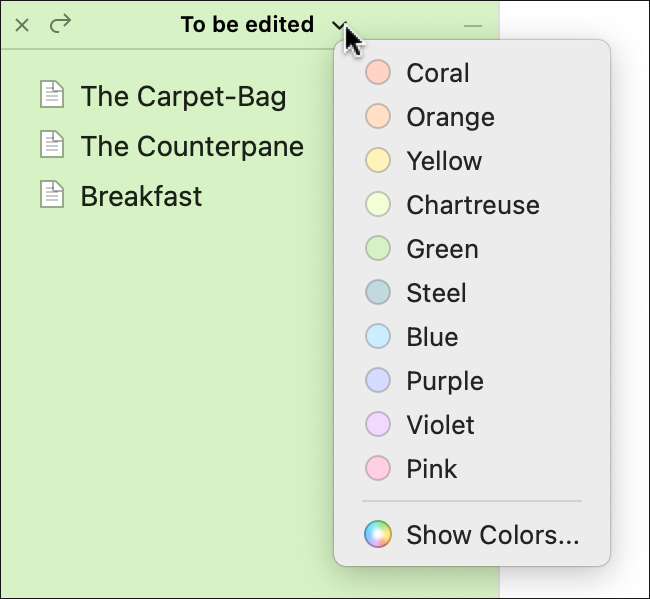
You'll note that when you click on a Collection name, the sidebar changes color; this is to remind you that you are no longer in the normal Binder view. You can change the color of any Collection by clicking the downward-pointing chevron next to its name and choosing a color.

You can use colors to indicate the type of Collection you create. If you create Collections for files containing specific characters, you could choose a color for each character. You may choose different colors for the status of files, whether they are first draft, edited, final draft, etc. Or you can use different colors for different timelines or point of view chapters in your project.
As you progress in your project, you can add or remove items from Standard Collections.
Using Saved Search Collections
When you're writing the first draft of a book, you don't pay too much attention to detail. When you go to revise that draft, you will probably find that there are a number of elements that you want to search for, to be able to make changes to place names, character names, or other elements in your book. As you progress through your drafts and revisions, it's likely that you will want to search for the same terms repeatedly. Scrivener's Saved Search Collections allow you to save searches to go back to them with a single click.
To create a Saved Search Collection, click the Search icon on the toolbar, just above the Binder, to display the Project Search field, then type your search terms. You can also choose Edit > Find > Search in Project, or press Command-Shift-F (Mac), or choose Edit > Find > Project Search on Windows, or press Ctrl+Shift+F.
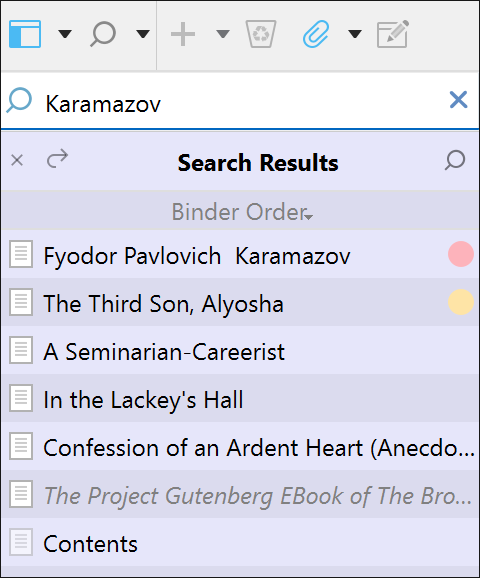
Type your search term, and Scrivener displays all elements that contain that term in the Binder. These include files, research, character or setting sketches, and more.

You can save this search by clicking the magnifying glass in the Project Search field. This displays a menu with many options; at the bottom of the menu is Save Search as Selection. Choose this, name your search, and it displays in the Collections list. You can return to this search at any time by clicking its name; this is a live search, that updates each time you click it, so any changes you have made to your project since the initial search are reflected in the search results.
Convert a Saved Search Collection to a Standard Collection
If you want to convert a Saved Search Collection to a Standard Collection, you can do so. However, this freezes the search at the time you make the conversion. Any changes to your project you make later won't be reflected in the Collection when you view it.
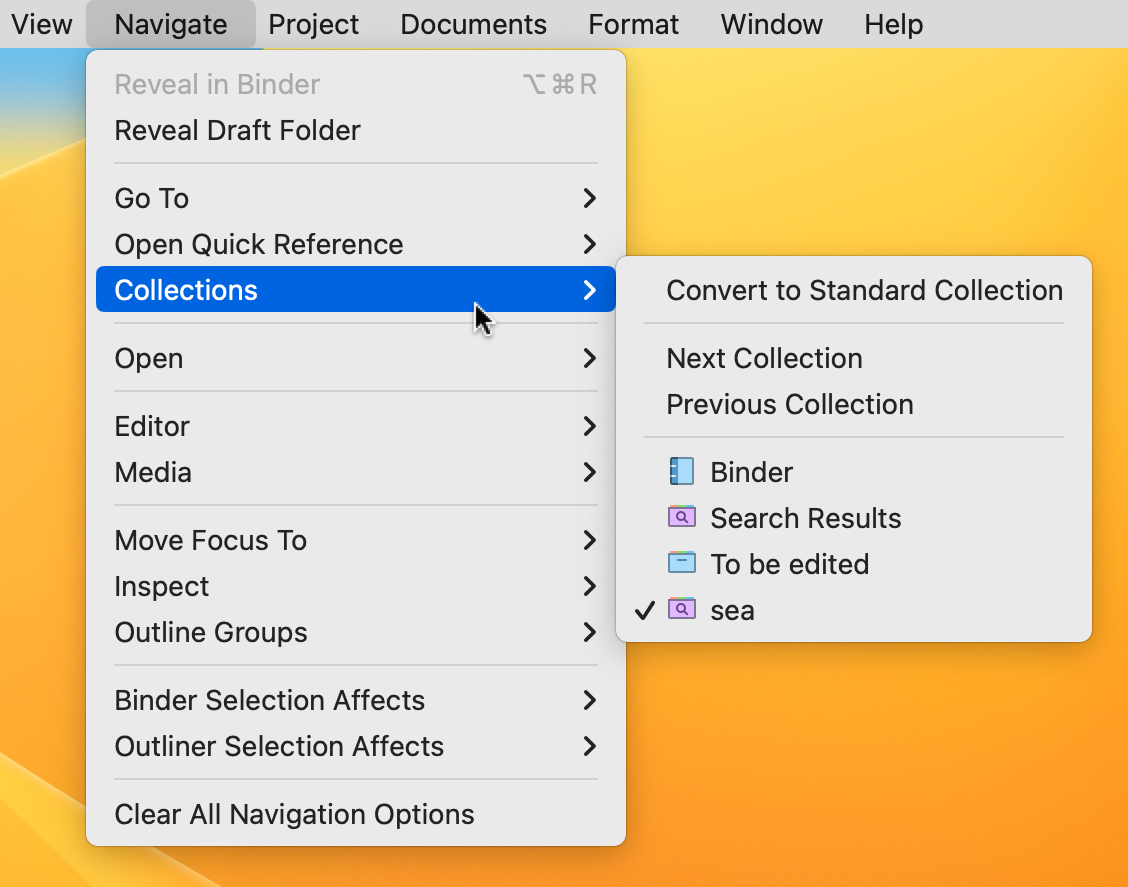
To convert a Saved Search Collection to a Standard Collection, choose Navigate > Collections > Convert to Standard Collection.
Navigate Collections
You saw above that the Navigate > Collections menu lets you convert Saved Search Collections to Standard Collections. That menu also lets you access collections without clicking the Binder header.

This is especially useful if you have a lot of collections; you can use this menu to quickly display one of them, and to go back to the Binder view.
Delete Collections
You can, of course, delete any collections, whether they are Standard Collections or Saved Search Collections. To do this, select a Collection, then click the - icon in the Collections header. If you delete a Saved Search Collection, you can recreate it by performing the search again, and saving it. If you delete a Standard Collection, you'll have to recreate it from scratch.
Collections are a powerful feature that leverage the Binder and project search to help you manage your projects. As always, there's lots more to Collections that what I've covered in this article. See Chapter 10.2 of the Scrivener manual, Using Collections.
Kirk McElhearn is a writer, podcaster, and photographer. He is the author of Take Control of Scrivener, and host of the podcast Write Now with Scrivener.

