Scrivener offers a number of options for printing all or part of a project.
Printing with Scrivener
Some writers can do all their work on a screen: writing, revising, proofreading, and final preparation. But others like to print out their work to make changes and edits. Scrivener offers a number of options for printing all or part of a project, and in this article, I'll tell you everything about printing with Scrivener.
Why print?
Every writer needs to revise, edit, and proofread their work. Some can do this digitally, but many authors prefer to print out their work and re-read it on paper. This allows you to see the work with different eyes, as it were, in different conditions. Reading a backlit screen is different from reflective paper, and, when you read on paper, you may be in a more comfortable position. If you've spent long hours staring at your computer, why not take some time to sit comfortably with a printout, a pencil, and a cup of tea or coffee?
Many people find that they spot more typos on paper than on a screen. One way to make this even more efficient is to change the font you use when you print your work. Your eyes get used to the font on the screen and the locations of line breaks; changing this means that you can read something with a different point of view.
In addition, when you read on paper, you're not distracted by other enticements on your computer; you can really focus on your words. Writer Tim Parks points out that, "While you sit at your computer now, the world seethes behind the letters as they appear on the screen. You can toggle to a football match, a parliamentary debate, a tsunami. A beep tells you that an e-mail has arrived. WhatsApp flashes on the screen."
Scrivener gives you multiple printing options. You can print individual documents in the Binder; you can print the index cards on the Corkboard; you can print your Outline; and you can print your entire draft, when you're ready.
Printing individual documents in the Binder
Sometimes you may want to print a single document in your Binder. This could be an entire chapter, or just a scene, or a much longer section of your project. To do this, select a document, or select multiple documents in Scrivenings mode, then choose File > Print Current Document. (Note that you can also print items in your Research folder, character sketches, setting files, and anything else in the Binder.)
If you first choose File > Page Setup (Mac) or File > Print Settings (Windows), you can adjust some settings. (On Mac, after choosing Page Setup, click the menu at the top of the dialog and choose Scrivener to see these settings.)
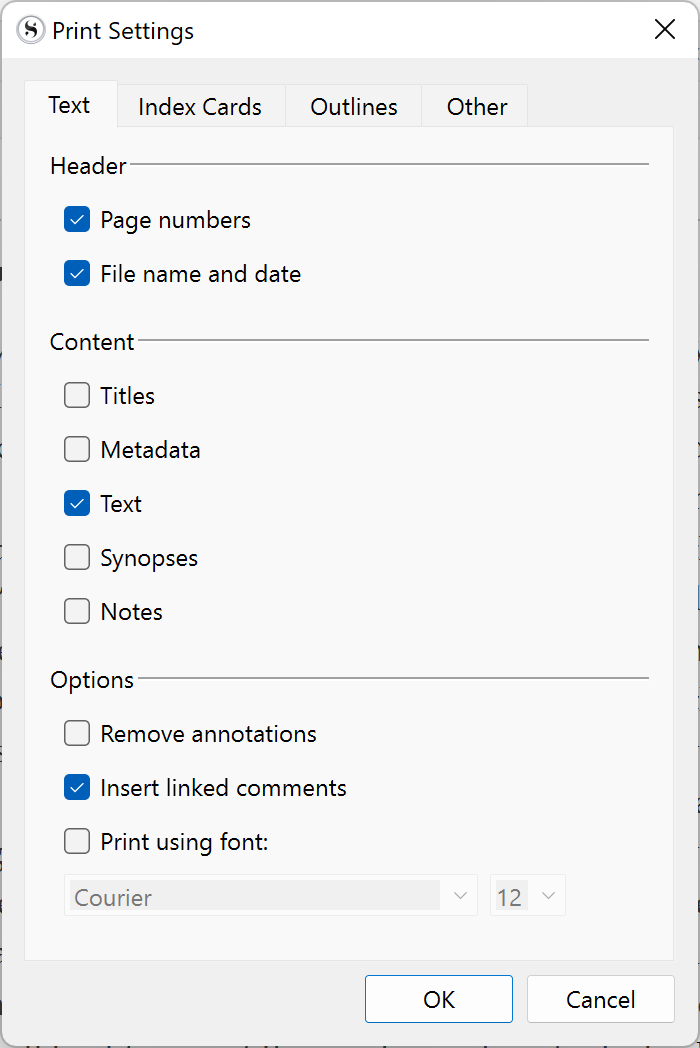
The Text tab contains options for printing documents. You can choose to print page numbers in the top-right corner of each page. These numbers are paginated for the current printout, not your entire draft. You can also tell Scrivener to include the file name and date next to the page number. This is a good way to ensure that, if you have multiple printouts, you know which is the most recent.
The Content section lets you choose to just print text, or to include titles, metadata, synopses, or notes. These options may be useful if you print your draft, rather than just a single document.
Finally, the Options section lets you remove annotations, insert linked comments, and change the font for printing. I strongly recommend changing the font, so you see your work differently than on screen. You can also choose comfortable font size here; you may be working with Scrivener zoomed in on your text on the screen, and, generally, 12 points or larger is comfortable on paper.
Printing index cards
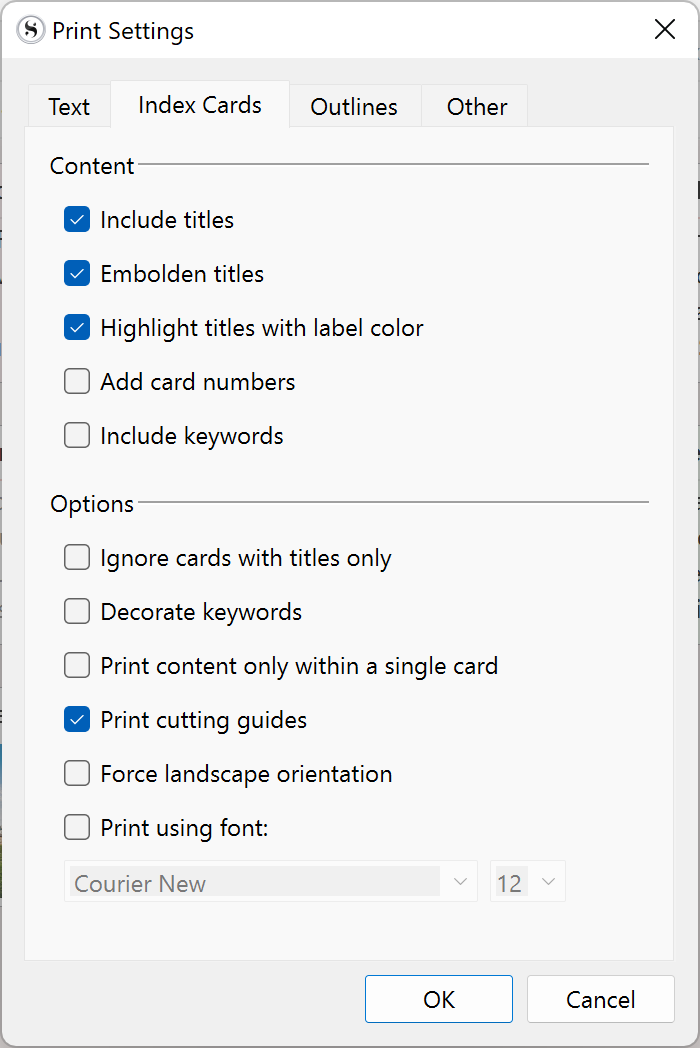
When viewing the Corkboard (View > Corkboard), you can print your index cards. This is great if you want to manipulate the index cards manually, to reorganize a project. The Index Cards tab of the Print Settings dialog includes a number of options for this, such as how card titles are handled (included, printed in bold, or with label colors), and more. In the Options section, Print cutting guides prints your cards to work with Avery Perforated Index Card stock, but you could print them on any kind of paper or card stock and cut them manually. Some printers will allow you to feed in actual index cards as well, though this option is only available with the Mac version of Scrivener.
Printing your outline
If you are viewing your Outline (View > Outline), you can print it out. You might want to do this to get a high-level view of your project away from the screen, and plan revisions or changes to the structure of your project, or to share a printout of your outline with someone else. The Outline tab in the Print Settings lets you choose a number of options for how the outline is printed.
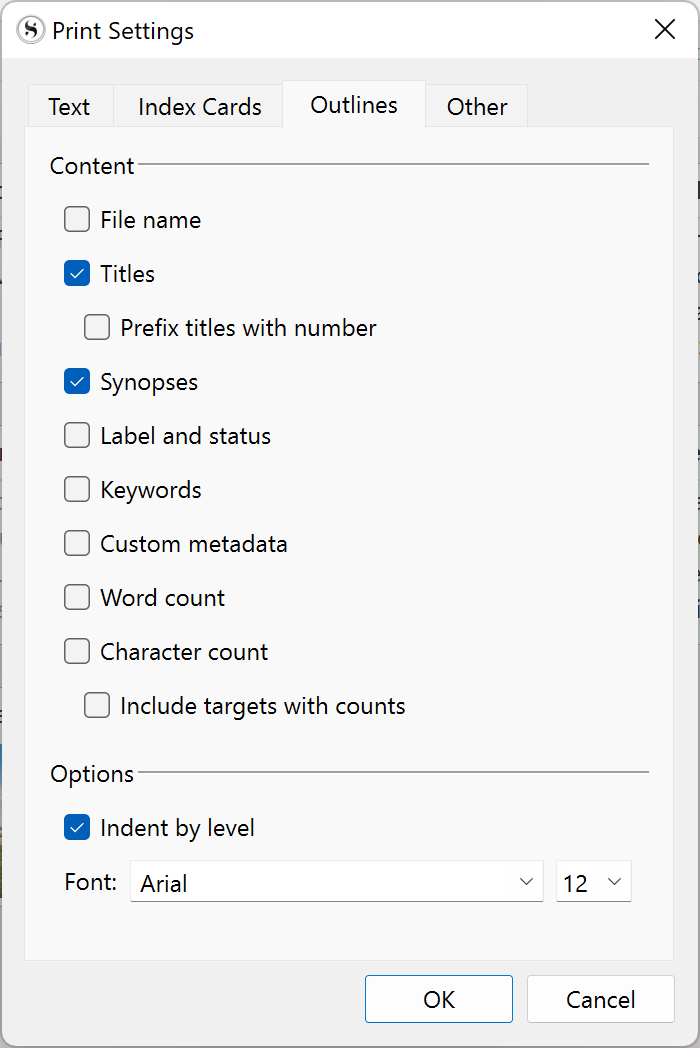
You can choose to print labels and statuses, keywords, custom metadata, and more. It can be helpful to include word counts, so you know, at a glance, how long each section is, if you've already made progress on your project.
Printing your draft
Finally, you may want to print your entire draft. There are several reasons to do this. You may want to do this to proofread it, or to share it with someone else: a friend who reads your work, an agent, or an editor. Printing your draft is also a good way of backing it up. While there are several ways to back up your Scrivener projects, having a printout stored in a safe place is an additional way of protecting your work.
To print the draft, select the Draft or Manuscript folder in the Binder, then choose File > Compile. I won't go into the more complex elements of Scrivener's Compile feature here - see Compiling Your Scrivener Project: The Basics to learn about this feature - but printing the draft is simple. From the top menu in the Compile dialog, choose Compile for Print. Click Compile to send the draft to your printer.
It's a good idea, however, before launching a several-hundred page print job, to first choose Compile for PDF, and save the draft as a PDF, so you can check it - you wouldn't want to find lots of blank pages, or discover that the font and size aren't right - before using up your toner. If the PDF is acceptable, you can just print from that.
Depending on how you work, you may want to print sections of your project as you progress, or your entire draft when you've finished; or you might want hard copies of your index cards or outline. Scrivener can print what you need, when you need it.
Kirk McElhearn is a writer, podcaster, and photographer. He is the author of Take Control of Scrivener, and host of the podcast Write Now with Scrivener.