You can use Scrivener projects to store multiple books or articles, and even use them as an archive of your writings.
Use Scrivener Projects to Store Multiple Books or Articles
Scrivener projects are extremely flexible. You could write a very long novel, a collection of short stories, or a series of articles or blog posts in a Scrivener project. Since Scrivener projects use a folder and file metaphor for storing and arranging texts, they can be used with any type of writing, even screenplays and comics.
If you write books, you may think that the ideal way to work with Scrivener is to create a separate project for each book. But there may be advantages to storing all your books in the same project. If you write short stories, articles, or blog posts, Scrivener‘s organizational features are the best way for you to keep an archive of your writings in a single project.
In this article, I'll discuss how you can work with multiple books or articles in the same project, how to split projects, and how to merge projects.

A brief overview of Scrivener projects
Scrivener projects are designed to hold all the elements of your writing, whether you write short articles or long novels. The Scrivener Binder, which replicates the familiar folder and file structure of a computer‘s file system, allows you to organize your work and rearrange it as necessary.
A Scrivener project is flexible; there is no theoretical limit to its size, or to the number of folders and files it can contain. While elements you may add to your Research folder, such as graphics, PDFs, or videos, may take up a lot of space, text doesn’t. You could store millions of words in a single Scrivener project.
Because of the way Scrivener works, project size does not affect the app‘s performance. Unless you have million–word text files, which is unlikely, each file you work with in your project does not require a lot of computing resources. So you could store 100 articles, or a dozen books in a single project, if you wish, and the app wouldn't be slowed down by all those texts.
One project per book
The easiest way to work with Scrivener is to have one project for each book you write. Some authors are very prolific, and may write dozens of books using Scrivener. If each book is in its own project, once you complete that book, you archive the project and move on to the next one. If you need to consult one of the previous books, you can open the project; for example, you may want to check some details if you are writing a series and need to know what a character did in a previous novel.
One project for multiple books
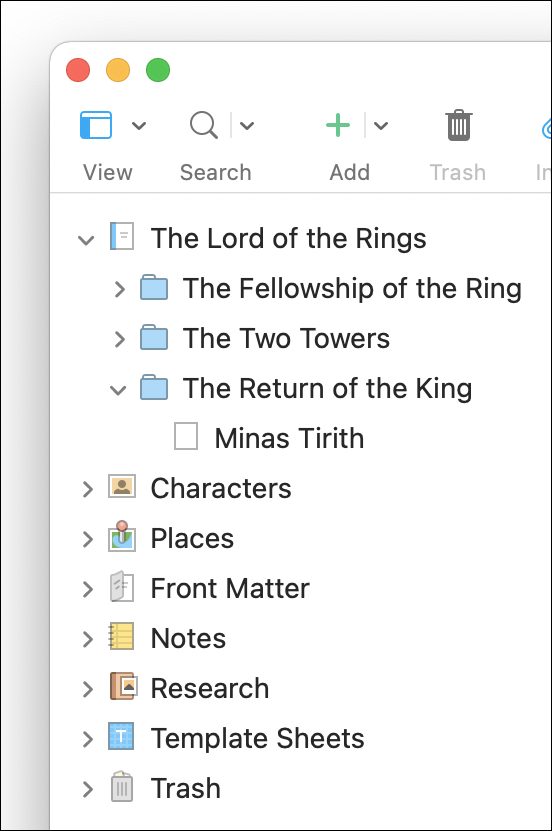
If you are a series writer, and do often need to check back to see what happened in previous books, you might want to use one project for all the books in your series. In this case, once you have completed a book, can you put all of its elements into a folder, with the book‘s title, and create new folders in the Binder for the new book. It might look like this, if you've just started writing the first chapter of the third novel in your trilogy:
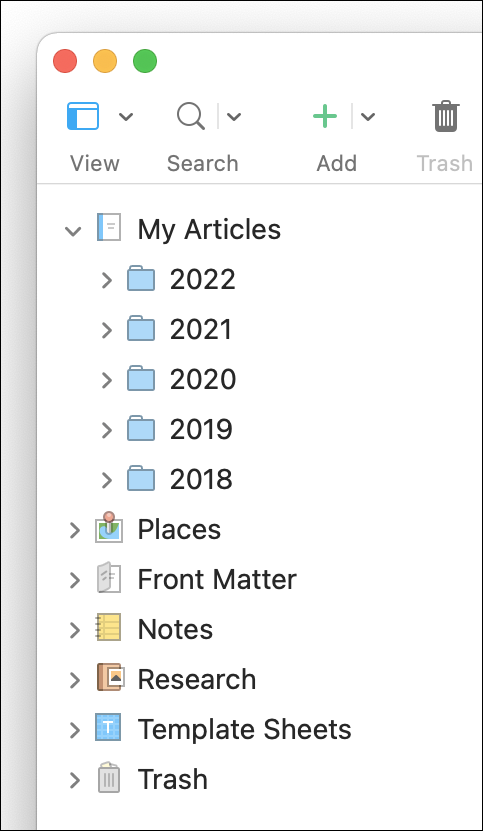
You might want to do the same for articles. You could create folders for each outlet you write for, or you could create a folder per year, or even per month if necessary. This allows you to easily go back and check on previous articles you’ve written, if you need to find details. And if you write short stories, you may want to keep them collected together.
Splitting projects
If you store several books in a Scrivener project, you can split the project if you want to separate them at any time. The easiest way to do this is to open the project, then choose File > Save As, and name the duplicate something like My Project Copy. When you do this, you'll be working in the copy; the original is no longer open. You can go through this copy and delete what you don't want to keep in the project. When you're finished, right click on the Trash folder at the bottom of the Binder, and choose Empty Trash to remove all the deleted files.
Note: before splitting or merging projects, make sure to back up your projects just in case. See this article about backing up Scrivener projects.
Merging projects
If you've already written two books of a trilogy, and decide that you now want to have all three of them in the same project, you can merge the existing projects. You could either create a new project for the trilogy, then import the two existing projects, or use one of the existing projects as your new, complete project.
Let's say you want to use your Book 1 project as your new project with two completed novels, and start writing the third installment. Choose File > Import > Scrivener Project, select the Book 2 project, and click Import. If you see a dialog asking you whether you want to Import and Merge, choose Import.
You'll now see something like this:
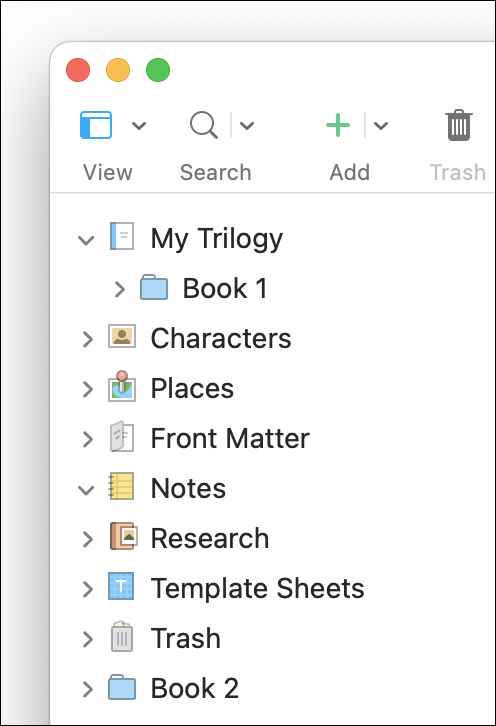
The imported Book 2 project is at the bottom of the Binder; move it where you want. You can have folders for each of the books beneath the top-level Manuscript or Draft folder at the top of the Binder.
If you want to later compile your new novel, select its folder in the Binder and choose File > Compile; don't select the Manuscript or Draft folder.
See Blogging with Scrivener for more tips on using Scrivener to manage blog articles.
Kirk McElhearn is a writer, podcaster, and photographer. He is the author of Take Control of Scrivener, and host of the podcast Write Now with Scrivener.