When you're finished writing, you need to get your work out of Scrivener. The compile feature allows you to do this.
Compiling Your Scrivener Project: The Basics
Your Scrivener projects are meant to be temporary. You use them as you're writing, but when you've finished, you need to export the text to use elsewhere. Whether you write articles, novels, non-fiction books, or screenplays, you eventually send your finished work - or your draft - to an agent or editor. This is when you use Scrivener's compile feature, which takes the many elements in your Binder and combines them to make a single file.
Scrivener's compile feature is complex, and in this article, I'm going to discuss the concept behind the feature, and explain how to use it in its simplest form. Future articles will go into more detail about compiling your Scrivener projects.
What is compile?
The dictionary on my Mac tells me that compile means "produce (something, especially a list, report, or book) by assembling information collected from other sources." And the etymology of this word is said to be "from Old French compiler or its apparent source, Latin compilare, plunder or plagiarize".
"Assembling information" is exactly what Scrivener's compile feature does. It pastes together all the elements in your Binder: the various files and folders which organize the structure of your work. And I like the idea of plundering a Scrivener project, digging into the days, weeks, months, or even years that you've been writing to bring out the loot of your thoughts and assemble something final.
In its most basic form, when you compile a Scrivener project, you export it in a form so it can be used outside of Scrivener, but compiling is much more than exporting. (And in Scrivener, export has a different meaning: you export a file or files from the Binder, or you export comments and annotations, etc.) Compiling in Scrivener is a sort of terminus; it's the sign that you've completed your project, and that it's ready to share. (Of course, you can compile at any time, and you may do this with your project at any stage, such as for different drafts.)
When you compile your project, you move it out of Scrivener into a different format. This could be a format that can be read by a word processor, such as .docx or .rtf, this could be a PDF, or it could be an ebook format, such as EPUB or Mobi that you are going to upload to a retailer. Compiling is, as the Scrivener manual points out, creating a file for working with "the rest of the world."
How compiling works
One important point about compiling is that the formatting you use when you compile your project can be different from what you see while working in Scrivener. You may use a large, monospaced font when writing in Scrivener, but compile in 12 point Times Roman. You may like to have extra spaces between paragraphs when writing, or wide margins; all these can be overridden when you compile your project.
This is very different from other apps that work with text; they generally work with WYSIWYG. When this idea became common in computing, it was a revolution; it allowed people to know that they can reproduce what they see on the screen when they print a document. With Scrivener, you have such flexibility in the compile process that WYSINWYG (what you see is not what you get), but this allows you to work differently and not write in a format that is not ideal for the creative process.
At its simplest, compiling takes the contents of the Draft or Manuscript folder, formats it as you specify, and outputs (or prints) it as a single document. Let's say you just want to print your entire project, you can do so using the compile function. Or if you want to save your document to a PDF file, you can also do this by compiling it.
To compile your project, choose File > Compile. You'll see the Compile dialog.
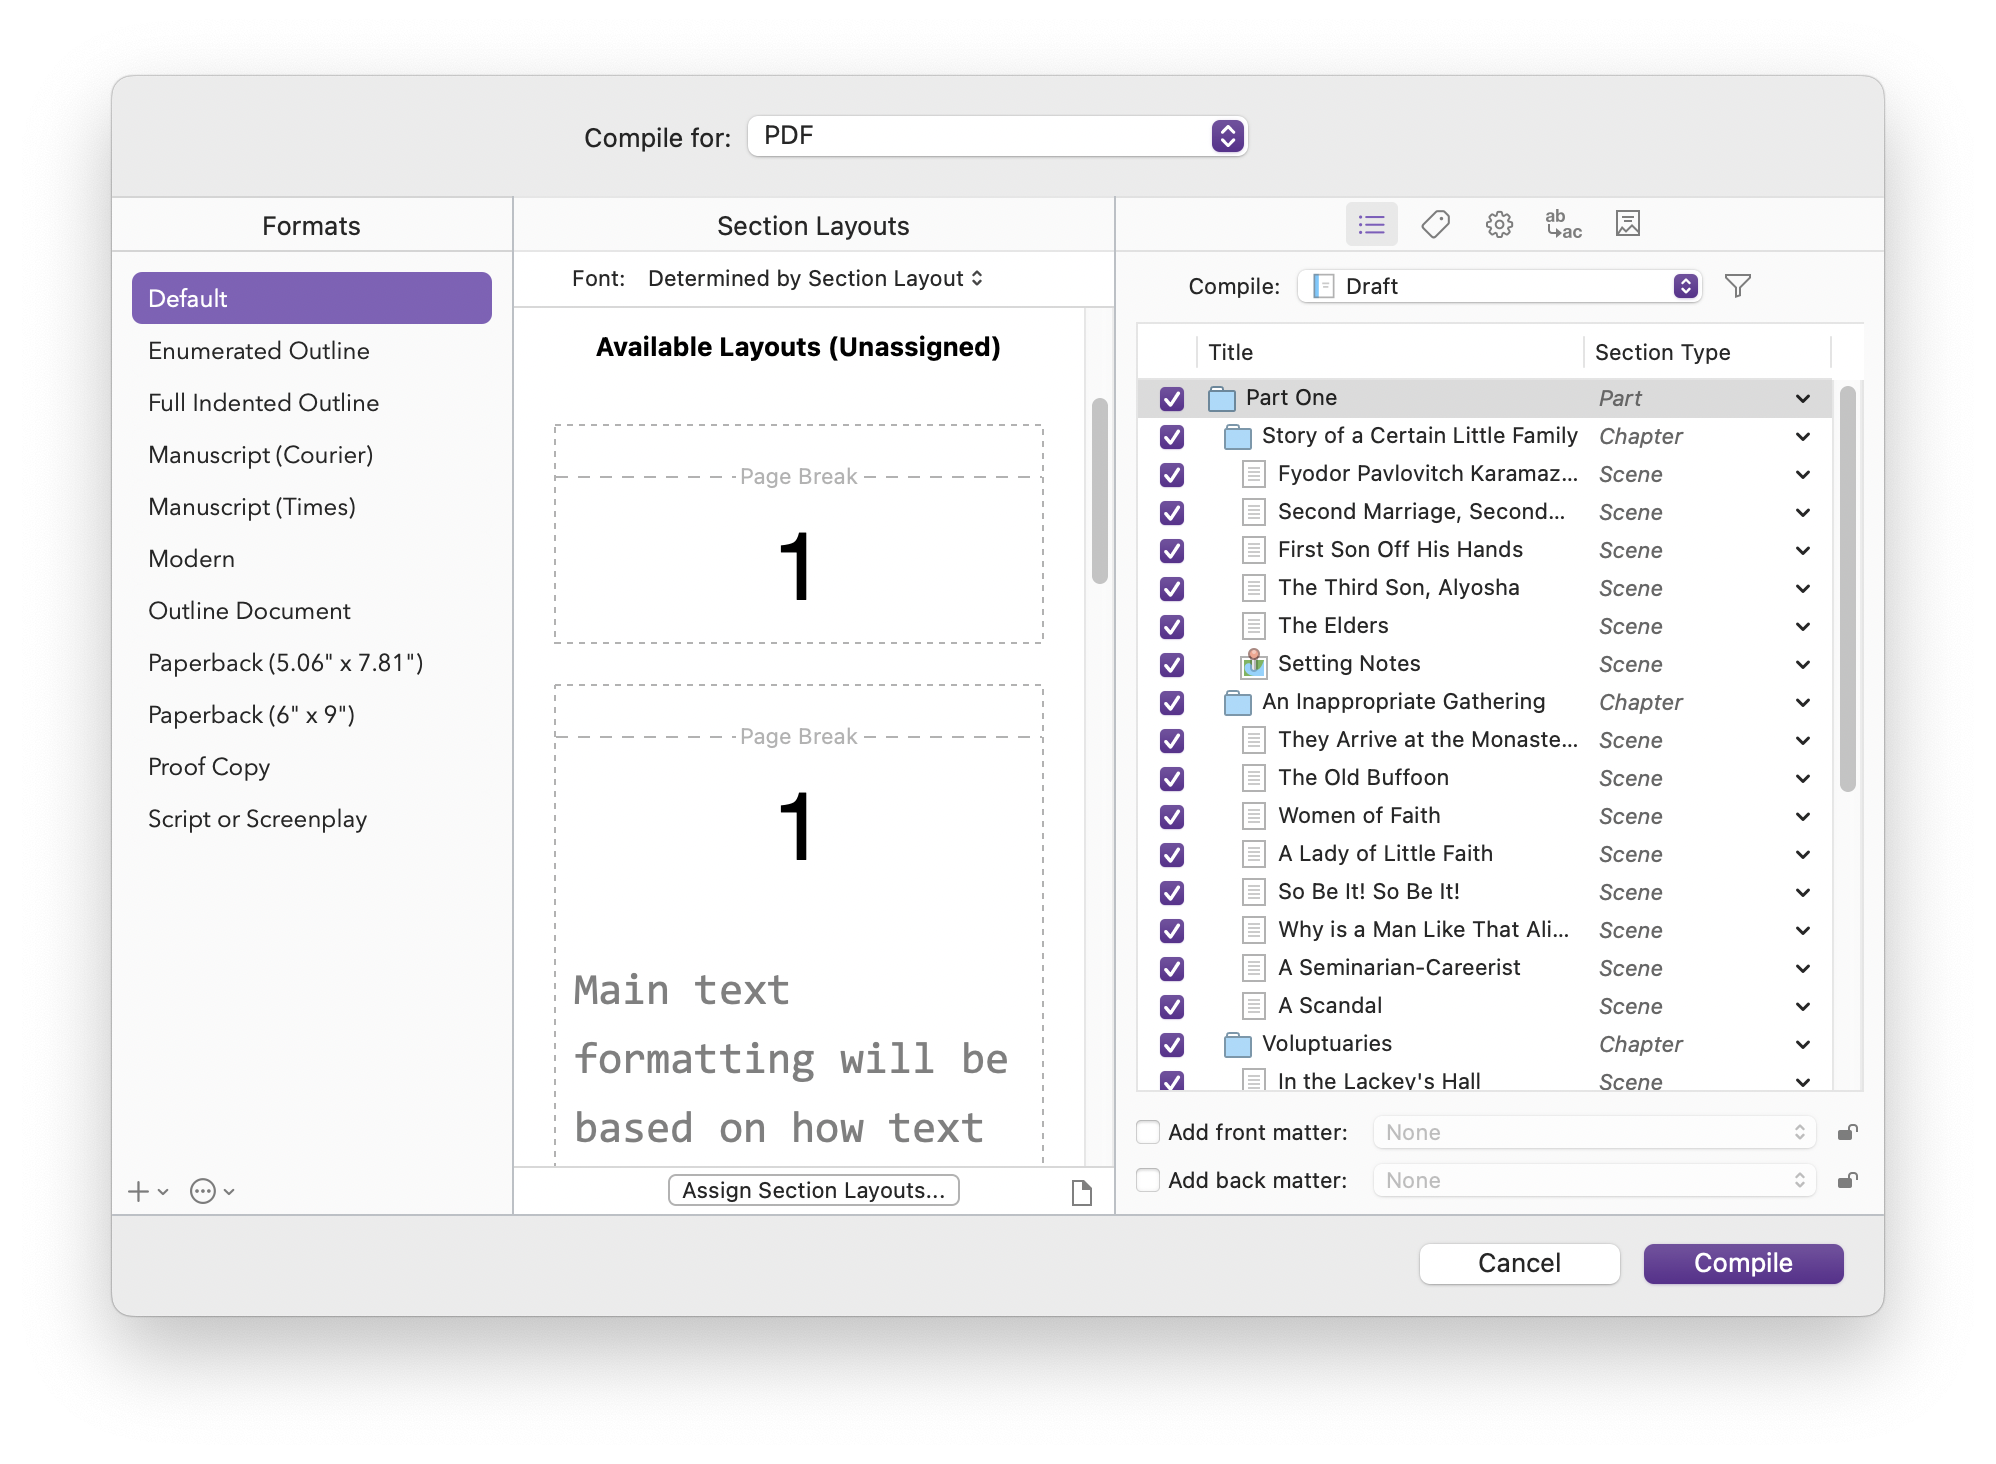
There's a lot going on in this screen, but for the purposes of this article, I'm only going to look at a few elements. First, the Compile For menu at the top is where you choose what type of file you want Scrivener to create. You have options to print or create a PDF; there are options for formatted text, such as .rtf, .docx, and .odt; you can compile for plain text (.txt) or HTML; you can compile in formats that are readable by Final Draft or Fountain (apps used for writing screenplays); you can save your project as an EPUB or Mobi ebook; and there are some options to compile your project in MultiMarkdown. (Don't worry if you don't know what all these formats are; if you're not familiar with them, then you don't need them.)
In the sidebar at the left, you see a number of formats; these correspond to page sizes and layouts, and what is available here depends on what you've selected in the Compile For menu, and also depends on whether you've created your own compile formats. We'll cover this in future articles, but for basic compiling, just use Default. As for the other sections of the window - Section Layouts and Compile Options - you can ignore these for now.
Try compiling your project to a PDF. Choose the Default format, click Compile, then click Export, and choose a location to save your document. Scrivener stitches it together, and creates a single file. You'll notice that the file contains the same formatting that you see in Scrivener. One of the advantages of compiling your project is that this formatting can be different. This requires that you assign section layouts to your project. We'll look at sections layouts in a future article.
One tip: if you want to print your project, it's a good idea to compile it first to a PDF rather than choose Print from the Compile For menu. Open the PDF and make sure everything is as you want, rather than printing hundreds of pages and finding that it isn't as you expected.
Compiling your Scrivener project is one of the key moments in the composition of your work. Scrivener's compile feature is very powerful, but at its most basic, you can easily create a sharable file of your project with just a few clicks.
For more on compiling Scrivener projects, see Using Section Layouts to Compile Your Scrivener Project,How to Use Front and Back Matter when You Compile Your Scrivener Projects, and, if you use Scrivener on iPad or iPhone, see Compile Scrivener Projects on iPad and iPhone.
Kirk McElhearn is a writer, podcaster, and photographer. He is the author of Take Control of Scrivener, and host of the podcast Write Now with Scrivener.