Scrivener's compile feature lets you format your project in many ways, and section layouts are the key to this formatting.
Using Section Layouts to Compile Your Scrivener Project
In a recent article, I discussed the basics of compiling your Scrivener project. When you compile a Scrivener project, you export it into a form that is usable by people who do not use Scrivener. You do this to print your project, or to send a project to an agent, editor, or writing buddy, so they can read the work.
In its simplest form, compiling just pastes together all your text in a single file, using the formatting you see in Scrivener's Editor. But the beautify of the compile tool is that you can adjust the formatting of each element of your project when compiling, and have different types of elements formatted differently; you do this with section layouts.
In this article, I'm going to explain what section layouts are, how to use them, and how to apply them to the different elements of your project when compiling.
What are section layouts?
The easiest way to think of section layouts is that they are like styles. In Scrivener, and in most word processors, you can configure styles that you apply quickly to headers, paragraphs, notes, and any other element of a text. When you work with styles in a word processing document, you may apply many styles in the same document, depending on how many different elements it has.
When compiling a Scrivener project, section layouts tell Scrivener how to format various elements when compiling; these elements are not at the text level, but at the Binder level. You've seen how your Binder contains files and folders; each of these elements can adopt section layouts when you compile your project.
What are section types?
Scrivener automatically assigns section types to Binder elements: these section types are defined in the settings for each project template. You can change these section types, and add your own, but for now, we'll just look at assigning section types to your project before compiling.
As I mentioned above, section layouts are similar to styles in a word processor, and section types are, in a simple sense, the names of styles. You can see the various section types available in a project by choosing Project > Project Settings, then clicking Section Types in the sidebar:
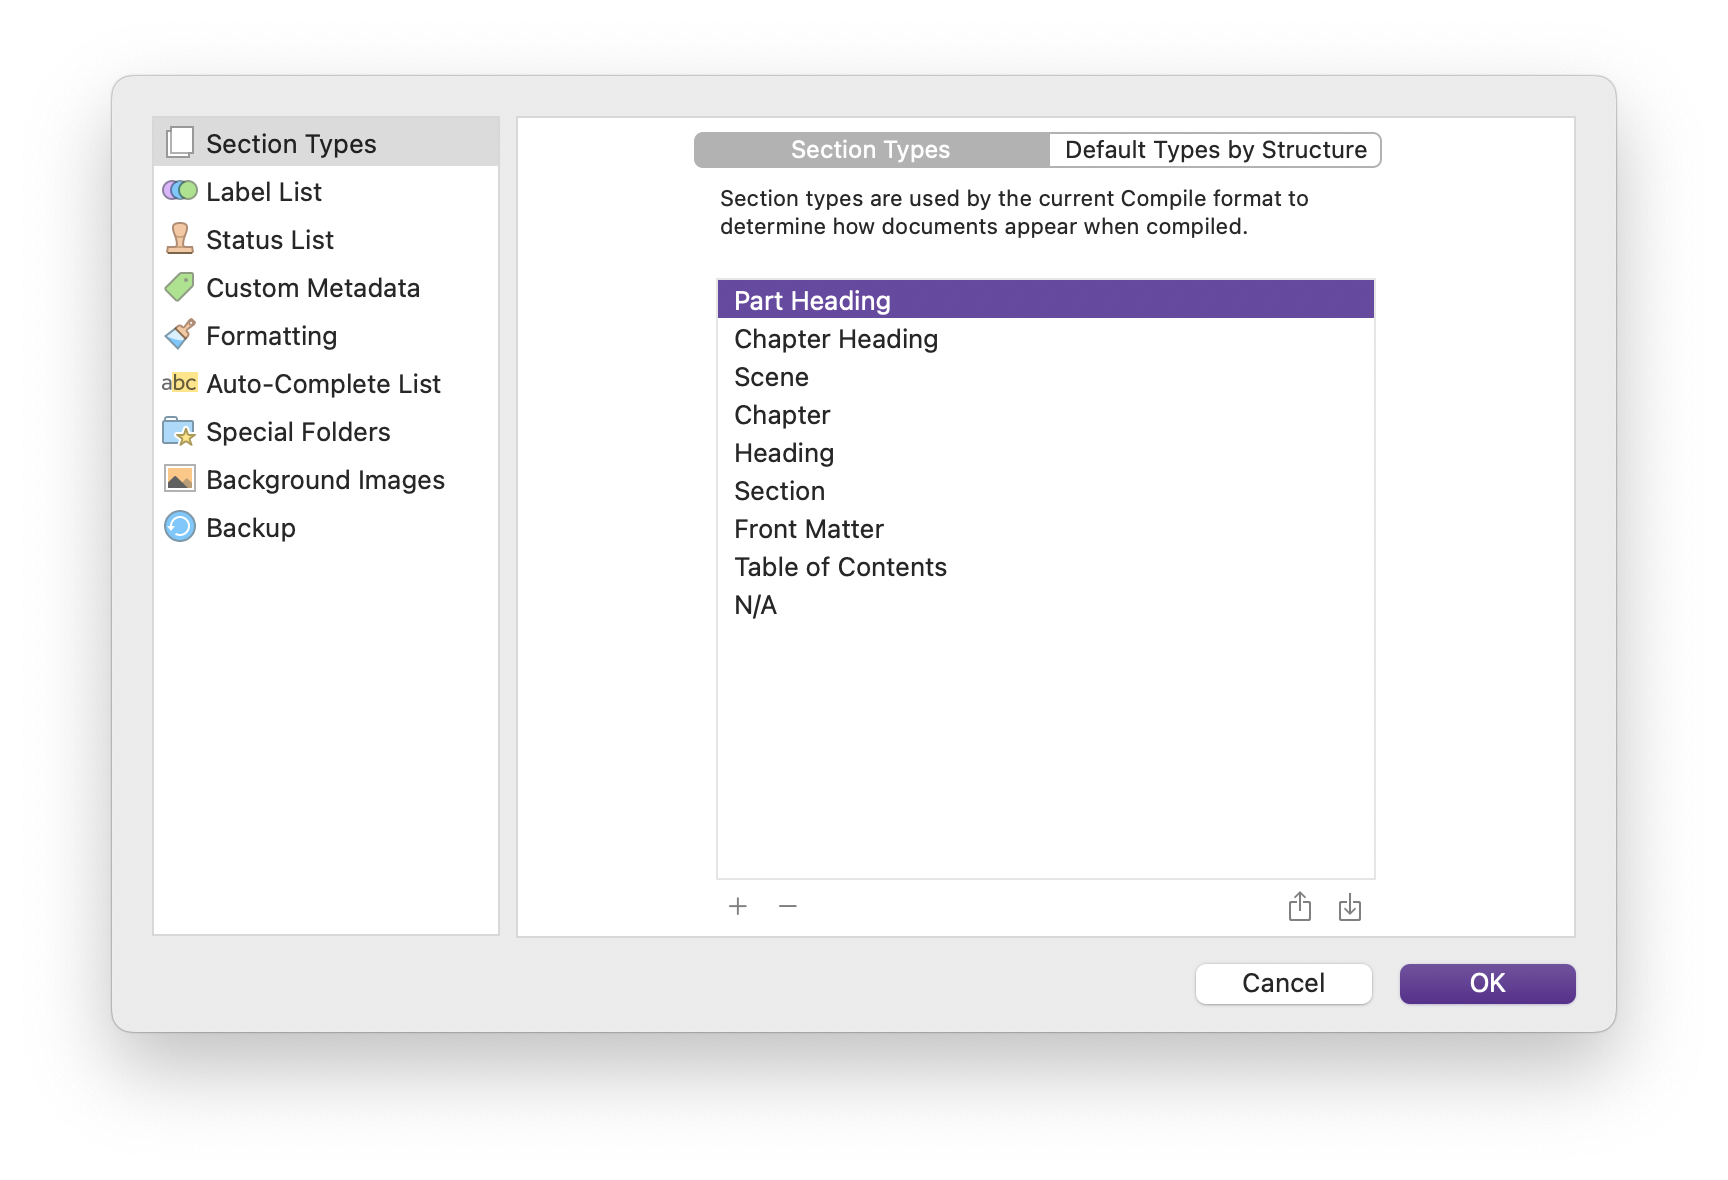
The above screenshot shows section types set up in the Novel template; each template has different section types, according to the type of work it is designed for. In this template, there are sections such as Part Heading, Chapter Heading, Scene, Chapter, and more. You'll apply these section types to the different elements in your Binder. You can add your own section types by clicking + at the bottom of the pane, but for now, just stick which the default section types.
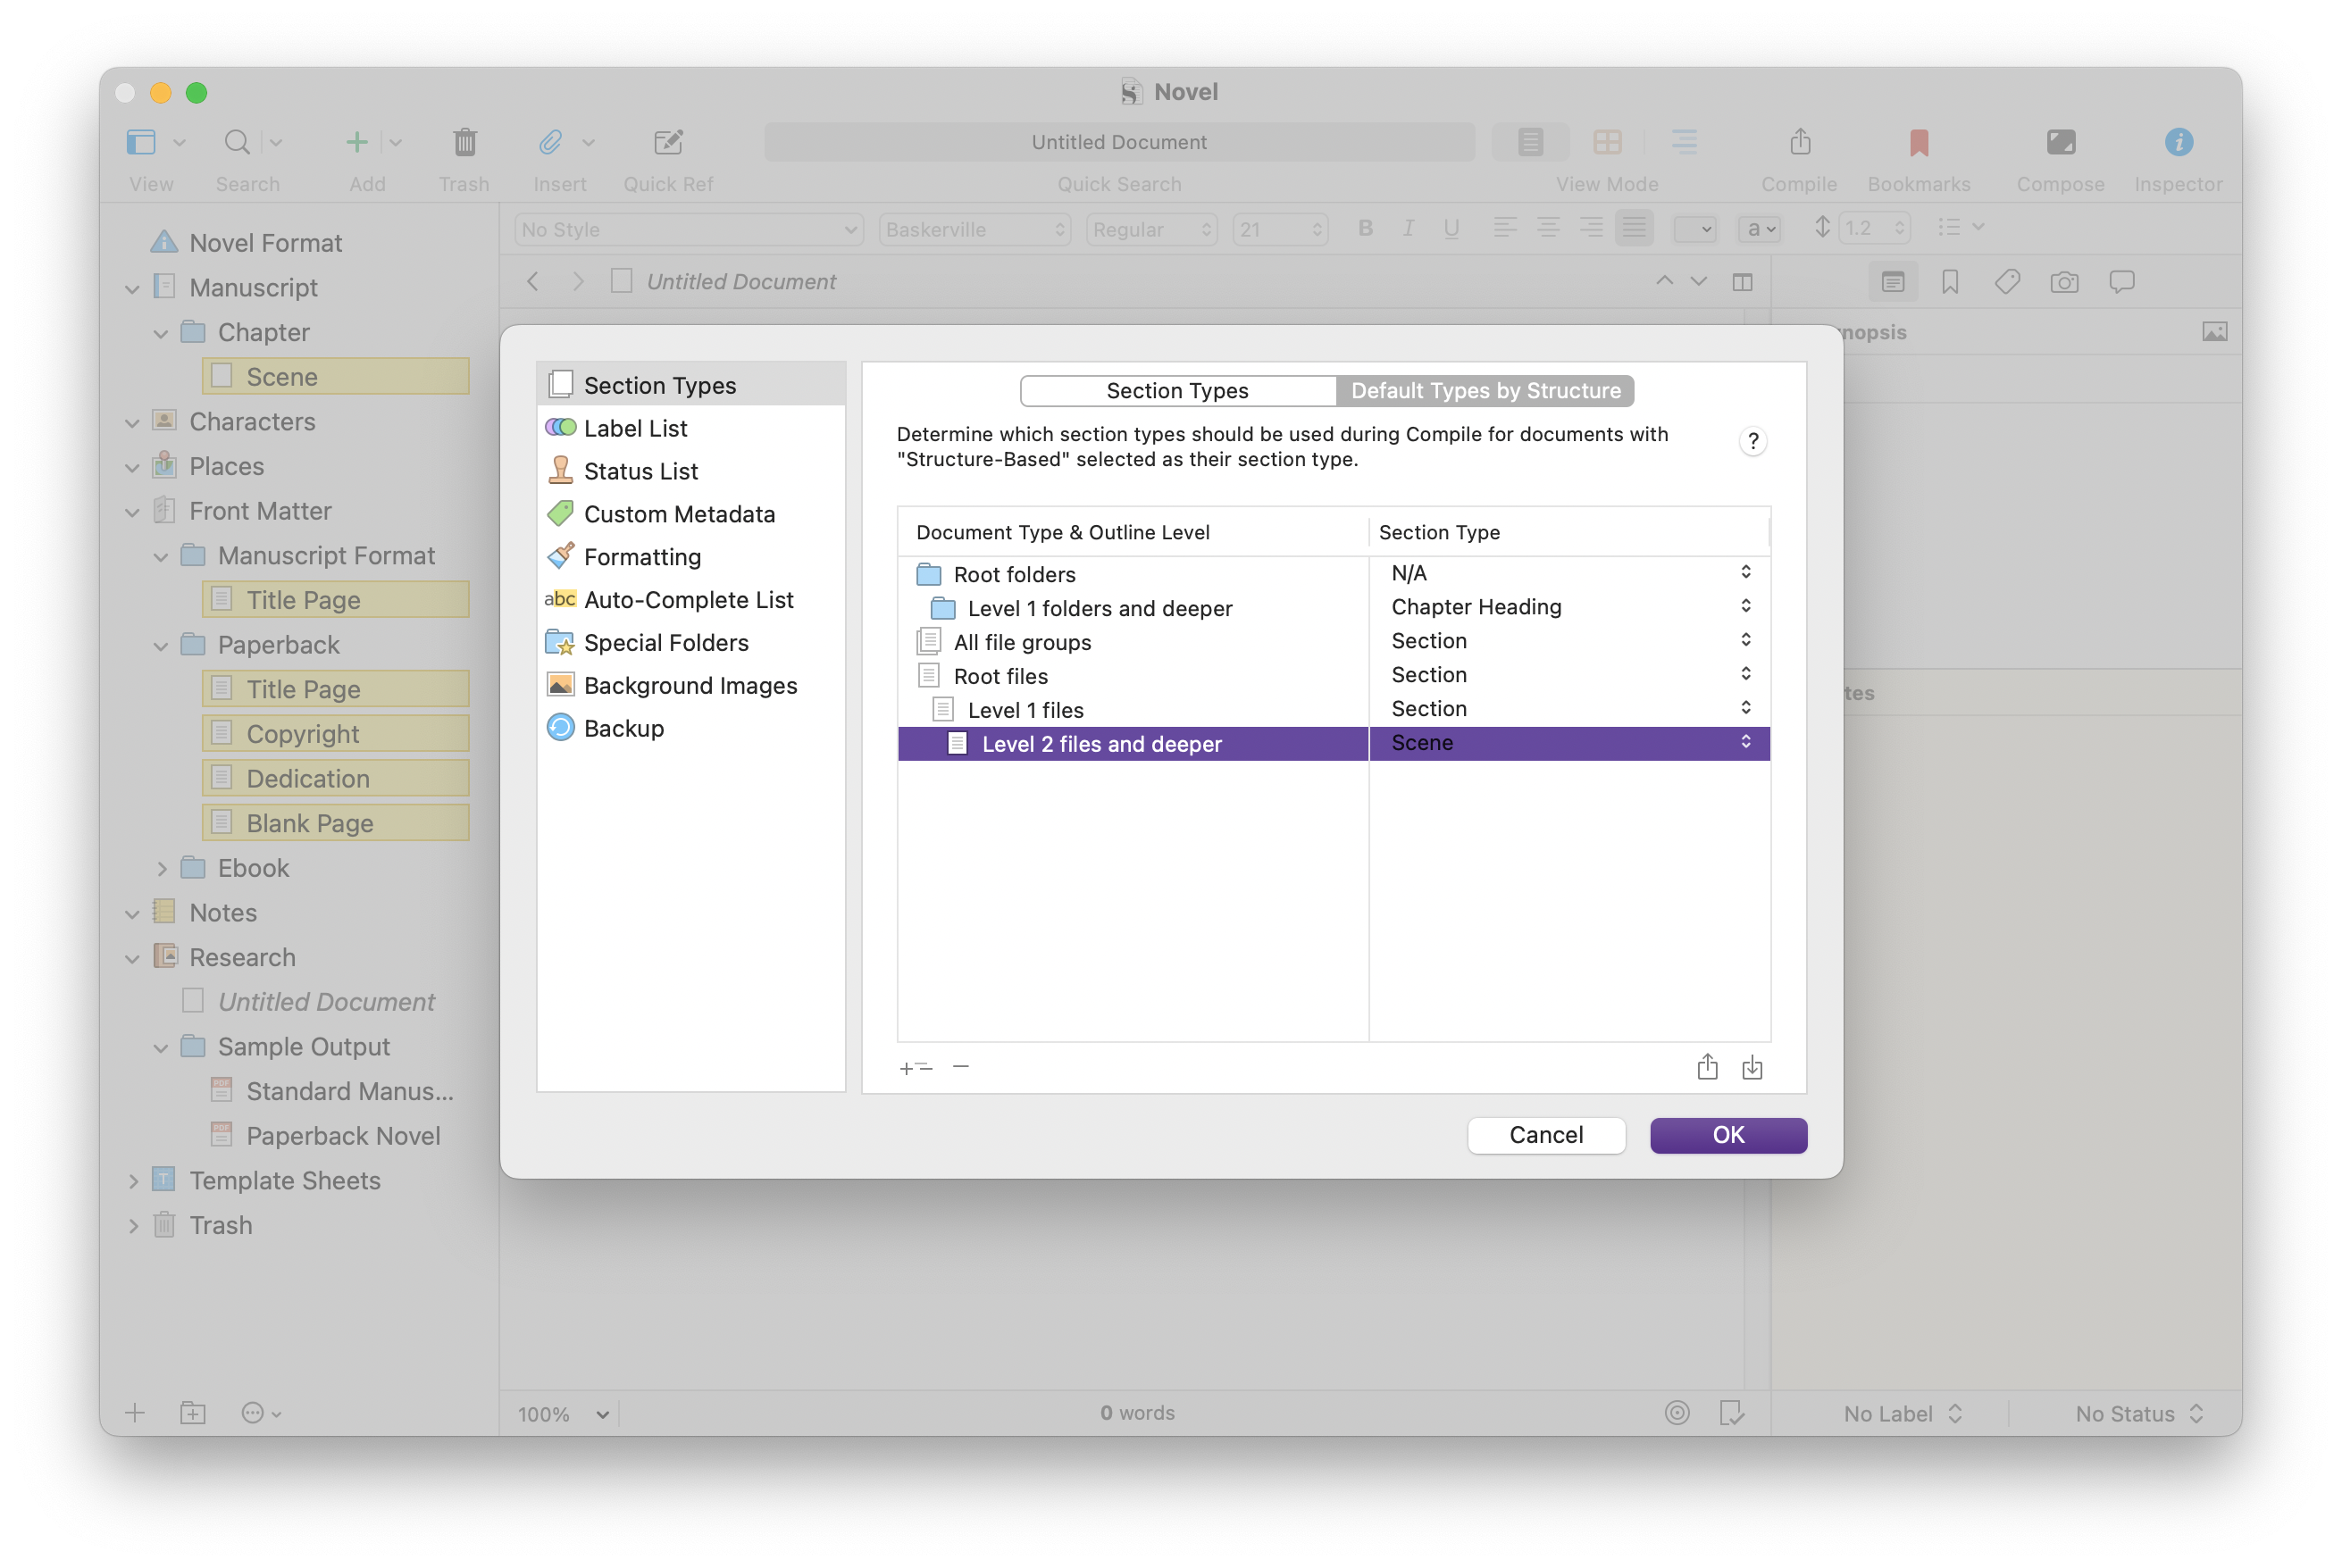
If you click the Default Types by Structure tab, you'll see how the section types are applied to different elements in the Binder.
You can see the following:
- Root folders: this is the top-level folder, such as Manuscript or Draft, folders for Characters, Places, Front Matter, and more.
- Level 1 folders and deeper: these are the next level folders. If you only have one level of folders, such as for each chapter of a novel, this is all you need. But you may have a more granular organization, and have several folder levels. If you click this line, then click the + at the bottom of the pane, Scrivener adds another folder level. In this case, the first line will read Level 1 folders, and the second will be Level 2 folders and deeper.
- All file groups: these are files in which you have embedded other files.
- Root files: These are top-level files in your Binder.
- Level 1 files: These are files just below Level 1 folders.
- Level 2 files and deeper: these are files below Level 2 folders, and deeper.
This may seem a bit complicated, but you'll notice that, as you click the various section types, Scrivener highlights them in the Binder; in the screenshot above, you can see that Level 2 files are highlighted in yellow.
Assigning section types
Now that you have a grasp of section types, it's time to look at how to assign them to your project. When you compile a Scrivener project, this screen displays:
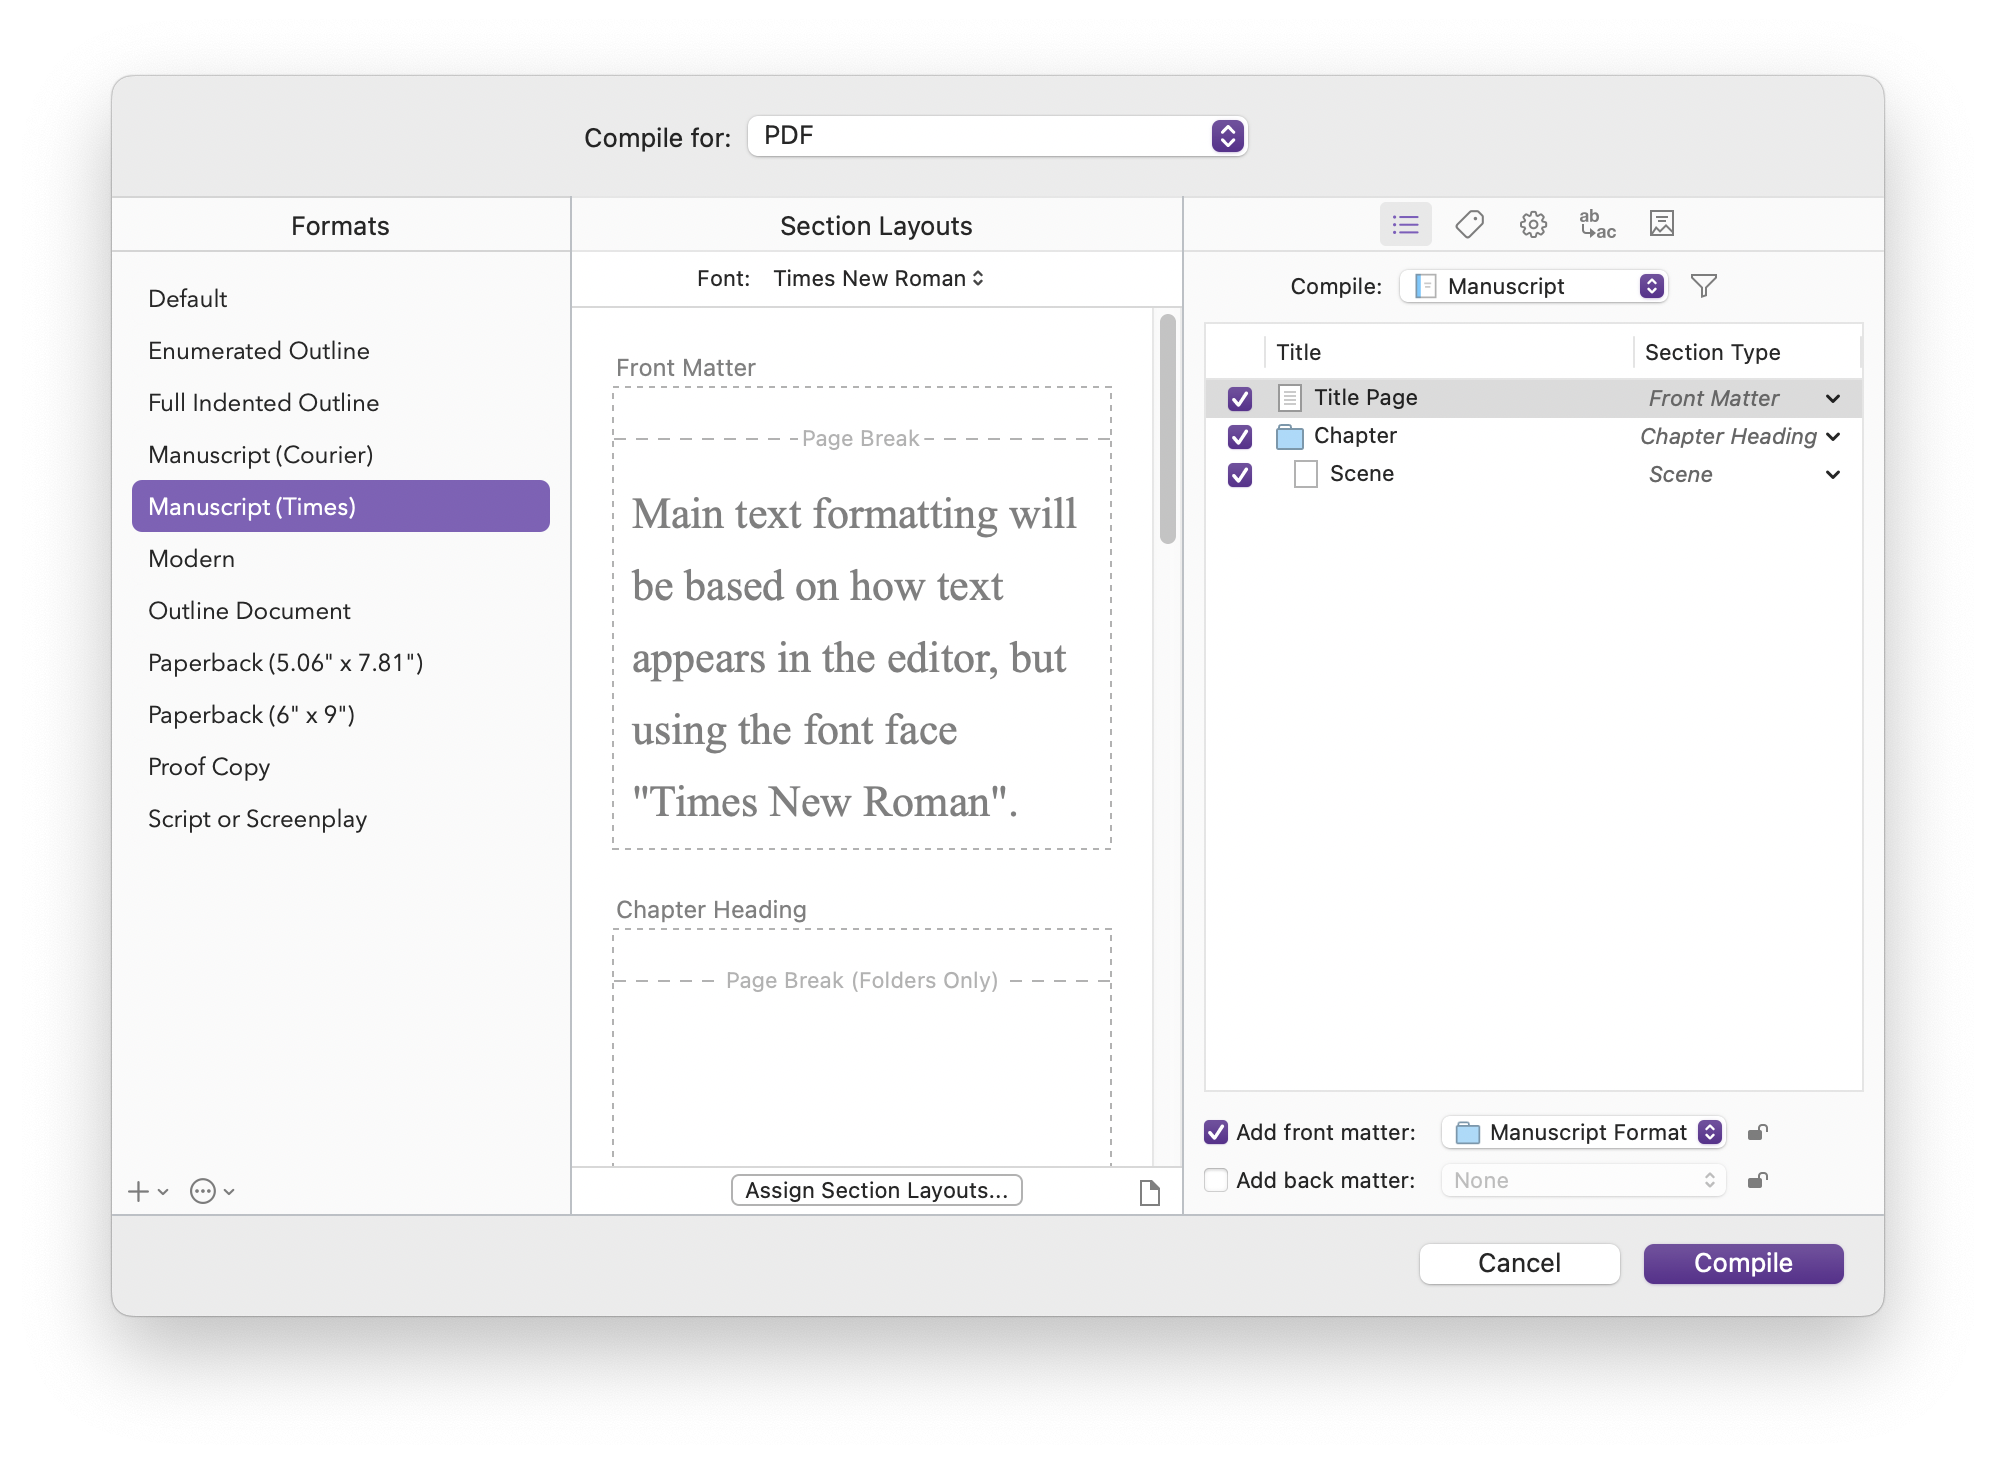
I've selected PDF in the Compile For menu at the top, and Manuscript (Times) in the sidebar. This compiles your project in a format adapted to send to agents and editors.
The basic Novel template is simple: you can see three elements at the right, where section types are assigned by default. These are the Title Page, Chapters, and Scenes. This structure would work if you have a file containing the novel's title, each chapter is a single folder, and the text of each chapter is in a single file.
When compiling, Scrivener creates a title page with the title, inserts a page break before each chapter, and adds a chapter title, if there is any, as a chapter heading, and then the text of the chapter. It does this for each chapter in the project. You can also see that Add Front Matter is checked below the section type list; this includes any text in the Front Matter folder.
You can change any of the section types in the right side of the window: just click one and choose a different one. All the section types you saw earlier in the Project Settings dialog are available here.
In most cases, if you're using one of Scrivener's built-in project templates, the default section type assignments are all you need. But if you have a more complex project, or if you start with the Blank template, then you'll need to do this manually.
Assigning section layouts
Now that you have your section types assigned, you need to assign section layouts. Again, Scrivener assigns section layouts by default, but you have lots of options. Let's look at Chapter Heading section layouts.
Click Assign Section Layouts at the bottom of the Compile screen, then click Chapter Heading in the sidebar. Chapter heading sections format the names of your chapters, and there are a number of available ways that Scrivener can do this. I've scrolled down a bit to show you the default Chapter Heading section layout.
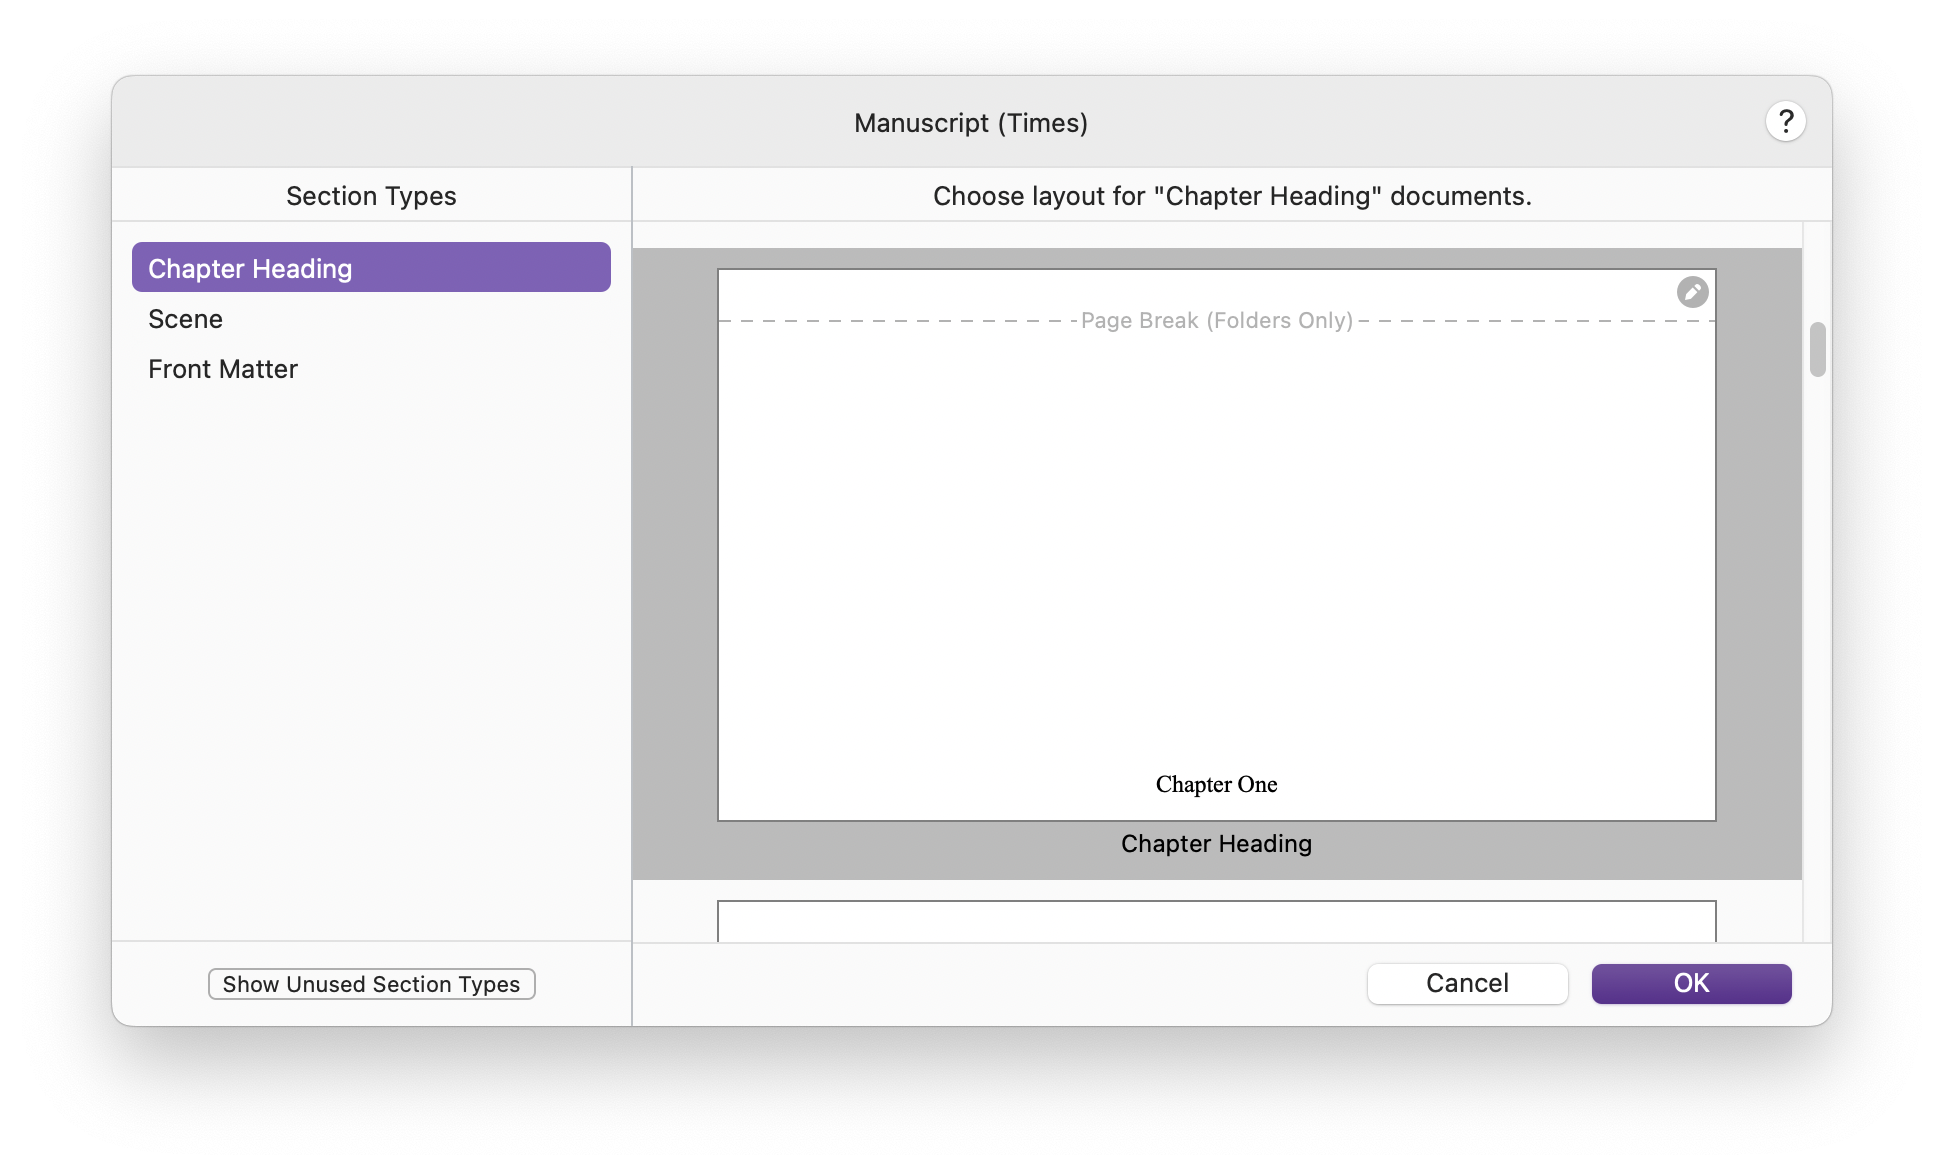
As you can see, Scrivener inserts a page break before each chapter heading, then puts "Chapter One," or the appropriate number for the chapter. If you scroll through the section layouts, you'll see other options. You can choose the chapter number and the section title (this is the title of the chapter's folder); you can choose just the section title; you can choose to have the chapter number right above the beginning of the chapter text, rather than on a separate page; and more. One section layout to note is "As-Is." This uses the formatting in your Editor rather than overriding it with section layouts formatting.
From here, you compile your project, and everything should be formatted the way you want.
Compiling Scrivener projects can be quite complex, because of the many options available. Section types and section layouts are the main way that Scrivener formats your compiled projects. In future articles, we'll go into more detail about compiling.
Kirk McElhearn is a writer, podcaster, and photographer. He is the author of Take Control of Scrivener, and host of the podcast Write Now with Scrivener.