Scrivener lets you choose your favorite font settings in the Editor, but also lets you set defaults for new projects, and custom fonts for any project.
Customize the Scrivener Editor 2 - Adjusting Fonts in the Editor
In last week's article, I explained how you can tweak the Editor to make it more comfortable to use. I discussed zooming to change the display, setting the Editor width, and adjusting margins, along with some other elements that you can change in Scrivener's options.
This week, I want to discuss how you can work with fonts in the Editor: how to change the font, size, alignment, and more. Most writers want to set fonts once and for all, and never change them, and I'll show you how to set the defaults for new projects.
Adjusting fonts in the Scrivener Editor
While Scrivener is very different from standard word processors, one element that is similar is the way fonts display in the Editor. You can choose a font, size, alignment, and spacing, and you can set margins and tabs. You can make text bold, italic, or underlined, you can change its color, and you can highlight text.
Note that the default font in Scrivener for Mac is Palatino, and for Windows it is Calibri. You can choose to use this font if you wish, or change it.
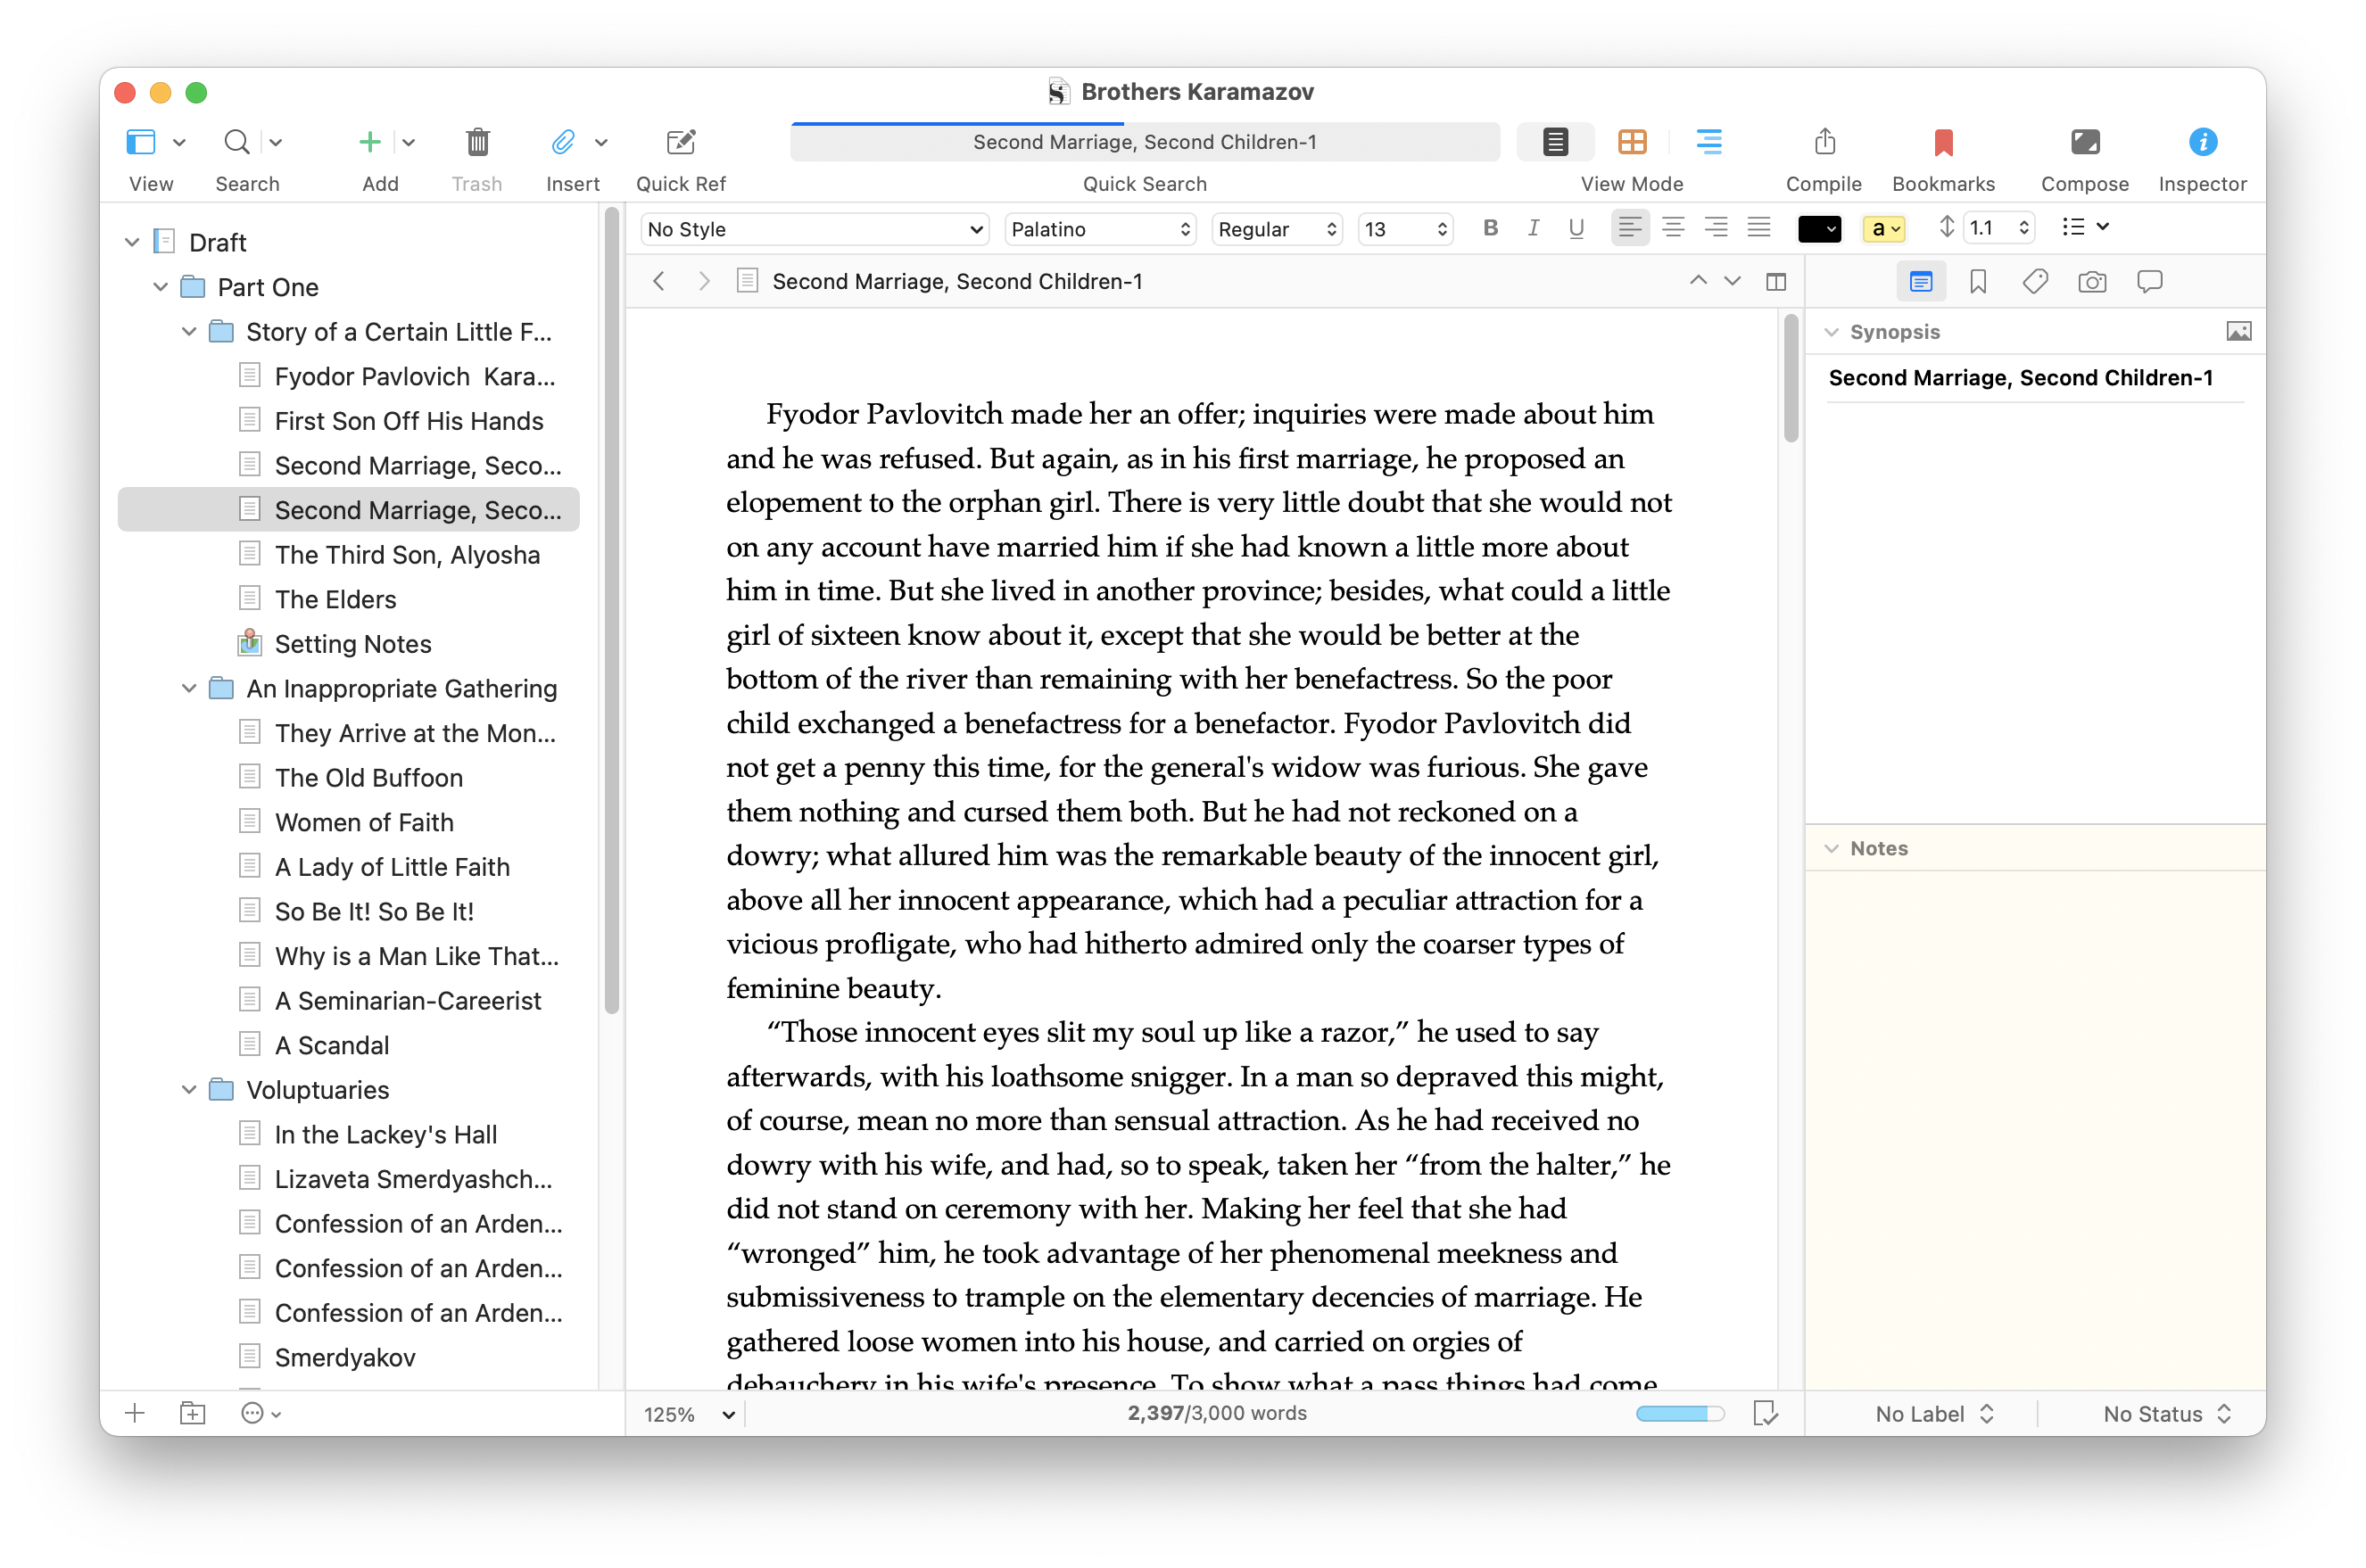
You do this by selecting text in a file, then choosing options in the Format Bar, where you can see options for the font (Palatino, in the screenshot below). You can set the font weight (regular, italic, bold, or bold italic), from the menu that says Regular in the screenshot below; you can also click the B, I, and U buttons to apply bold, italic, or underline character styles. You can choose a style, and set alignment (ragged right, centered, ragged left, or justified). The final font setting is line spacing, which in the screenshot below is set to 1.1.

Here's a closeup of the Format Bar, highlighting the different elements:

1 - Font menu
2 - Weight menu
3 - Font size menu
4 - Bold, italic, underline buttons
5 - Alignment buttons
6 - Line spacing menu
Setting font preferences for the Scrivener Editor
You may be used to setting your font, size, and other preferences in your documents, and, as you saw above, you can do that in Scrivener. But you can also set preferences for the Editor globally, in Scrivener's Preferences (Mac) or Options (Windows).
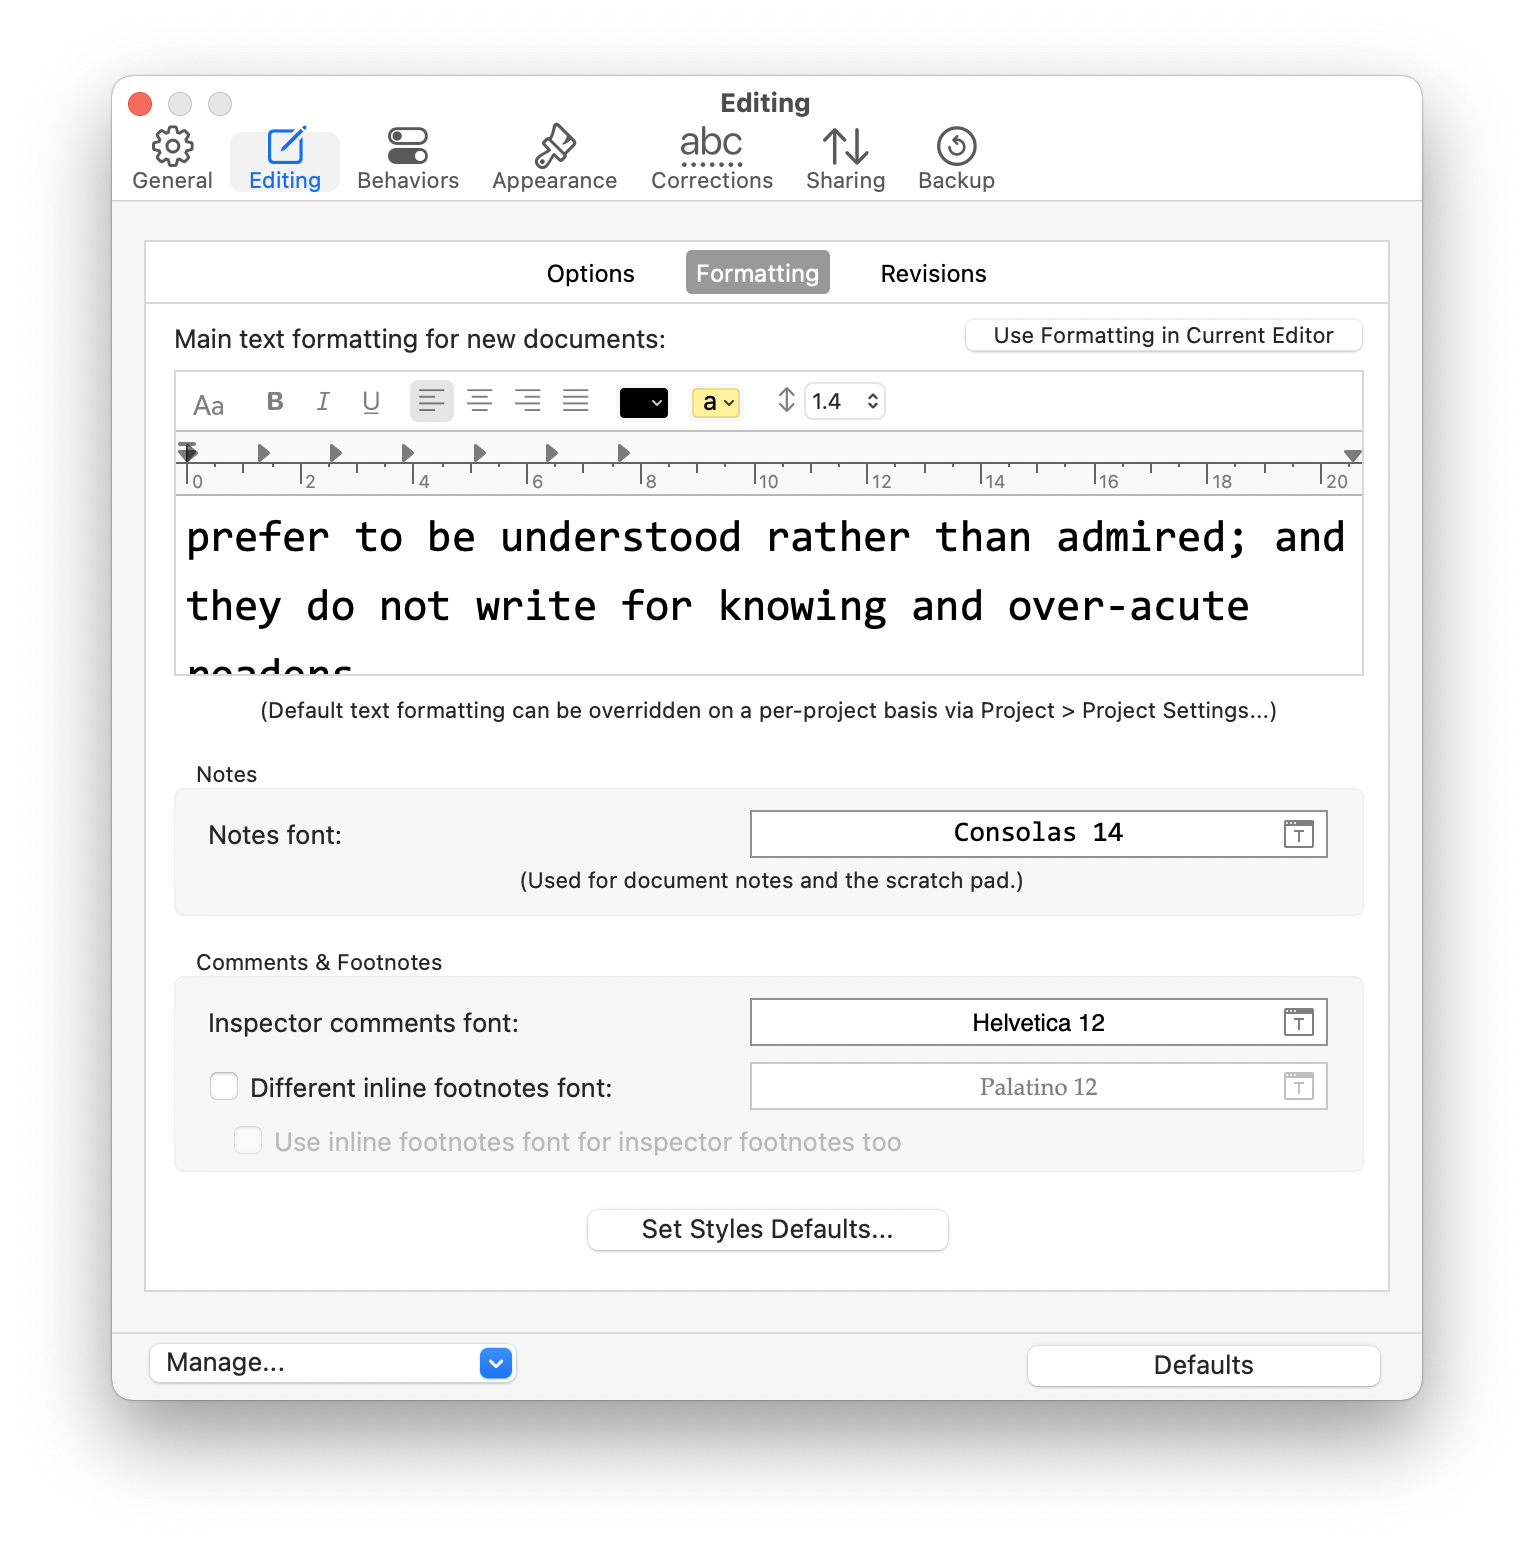
On Mac, choose Scrivener > Preferences; on Windows, choose File > Options. Click the Editing tab, then click Formatting.

One way to set your defaults is to click Use Formatting in Current Editor. Scrivener will adopt all the settings you've made, as described above, to new documents. Note that if you do this, it will not affect documents you've already created that are using different settings. (You can also apply these settings by clicking anywhere in a paragraph that contains the settings you want to save, then choosing Format > Make Formatting Default.)
If you want to adjust your font settings in the Preferences / Options, you can do so. Just use the menus and buttons - which are the same here as in the Editor - and you'll see the sample text change. (Note that, on Mac, the font menu displays when you click the Aa button. On Windows, you'll see the name of the font in that position.) You don't need to save these settings; Scrivener automatically updates the defaults to what you set in this dialog.
You can see that these settings also allow you to set fonts for Notes, Inspector comments, and footnotes.
If you ever want to reset the font settings to the default, click Defaults on the Editing settings dialog.
Custom font settings per project
If you've set the default font settings as explained above, and you want to change them for a specific project, you can do this using the Project Settings dialog. Open the project, choose Project > Project Settings, then click Formatting.

If you want the formatting to be different for this project, Check Use different default formatting for new documents in this project. You can make the same kind of changes as with the above default settings, but these changes won't affect any other project.
There's a lot more you can do with these settings, and in future articles I'll discuss saving settings as presets, using themes, and using styles to format your texts. And check out these 5 Tips for Customizing the Scrivener Editor.
Kirk McElhearn is a writer, podcaster, and photographer. He is the author of Take Control of Scrivener, and host of the podcast Write Now with Scrivener.

