Using styles to format your Scrivener projects can save you a lot of time, and ensure more consistent formatting.
Customize the Scrivener Editor 3 - Use Styles to Format Your Scrivener Projects
In previous articles about customizing the Scrivener editor, I discussed setting up the Editor space, and customizing fonts in the Editor. This week I want to talk about using styles to format your Scrivener projects.
Styles are combinations of settings for text that you can use and re-use for consistency, and for ease of formatting, in your projects. Styles go beyond just customizing the Editor, and are one of the most powerful tools you can use to format projects.
What are styles?
Styles combine settings to make it simpler to format your writing as you progress, or after you've written your work. Styles can include font settings such as the font face, size, and color; they can include line spacing; and they can include paragraph settings such as alignment, tabs, and more.
In early word processors, you had to apply style settings to each bit of text that you wanted to format differently, but when styles were developed, this was a way to reapply settings whenever and wherever you wanted to. Styles allow web pages to be formatted consistently, through the use of CSS (cascading style sheets) that define how different types of text look.
In this article, you can see that there's a title at the top of the page in one style; the body text of paragraphs are a different style; and the header just above this paragraph is another style. Rather than having to manually adjust the various settings each time your text changes - such as from header to body text - styles allow you to apply settings with a click.
There are two types of styles in Scrivener: character styles and paragraph styles. Character styles include the basics, such as a font, its size, its weight (bold, italic, etc.), and any specific adjustments such as kerning. Paragraph styles include alignment, whether the paragraph indents on the first line, any tab stops used, line spacing, and more. Think of character styles as affecting how the letters look, and paragraph styles affecting how paragraphs look. But styles don't have to specify a font; they can specify everything that formats text without including a font.
Styles are independent of the text they apply to. Because of this, you can change the definition of a style in your project, and all the text using that style changes accordingly.
Using styles in Scrivener
Styles are complex, and I could write a great deal about them, but in this article, I just want to present the basics to make it easier for you to adopt the concept of styles, if you don't already use them. (If you want to go deep into Scrivener and styles, chapter 17 of the Scrivener manual on Windows and chapter 15.6 on Mac explain all the details.)
What's important to know about styles is how you can easily switch from one style to another when writing, and that you can also easily change them back. And there is one thing to bear in mind when you use Scrivener: while in a word processor, you generally apply styles to all of your text, in Scrivener, you only apply styles to parts of your project that are different than the defaults, which I explained how to set up in this article. You do this because styles override other compile formatting, so if any of your text is given a Body style, none of the usual formatting for a given compile format will apply.
To use styles in Scrivener, you can click the Styles menu in the Format Bar above the Editor (if the Format Bar is visible), but an easier way to use styles is to display the Styles Panel. To do this, choose Format > Style > Show Styles Panel, or press Control-S (Mac) or Alt+S (Windows). The Styles Panel is practical because it floats above your project allowing you to easily apply styles.
Here's what the Styles menu and Styles Panel look like in front of a Scrivener project.
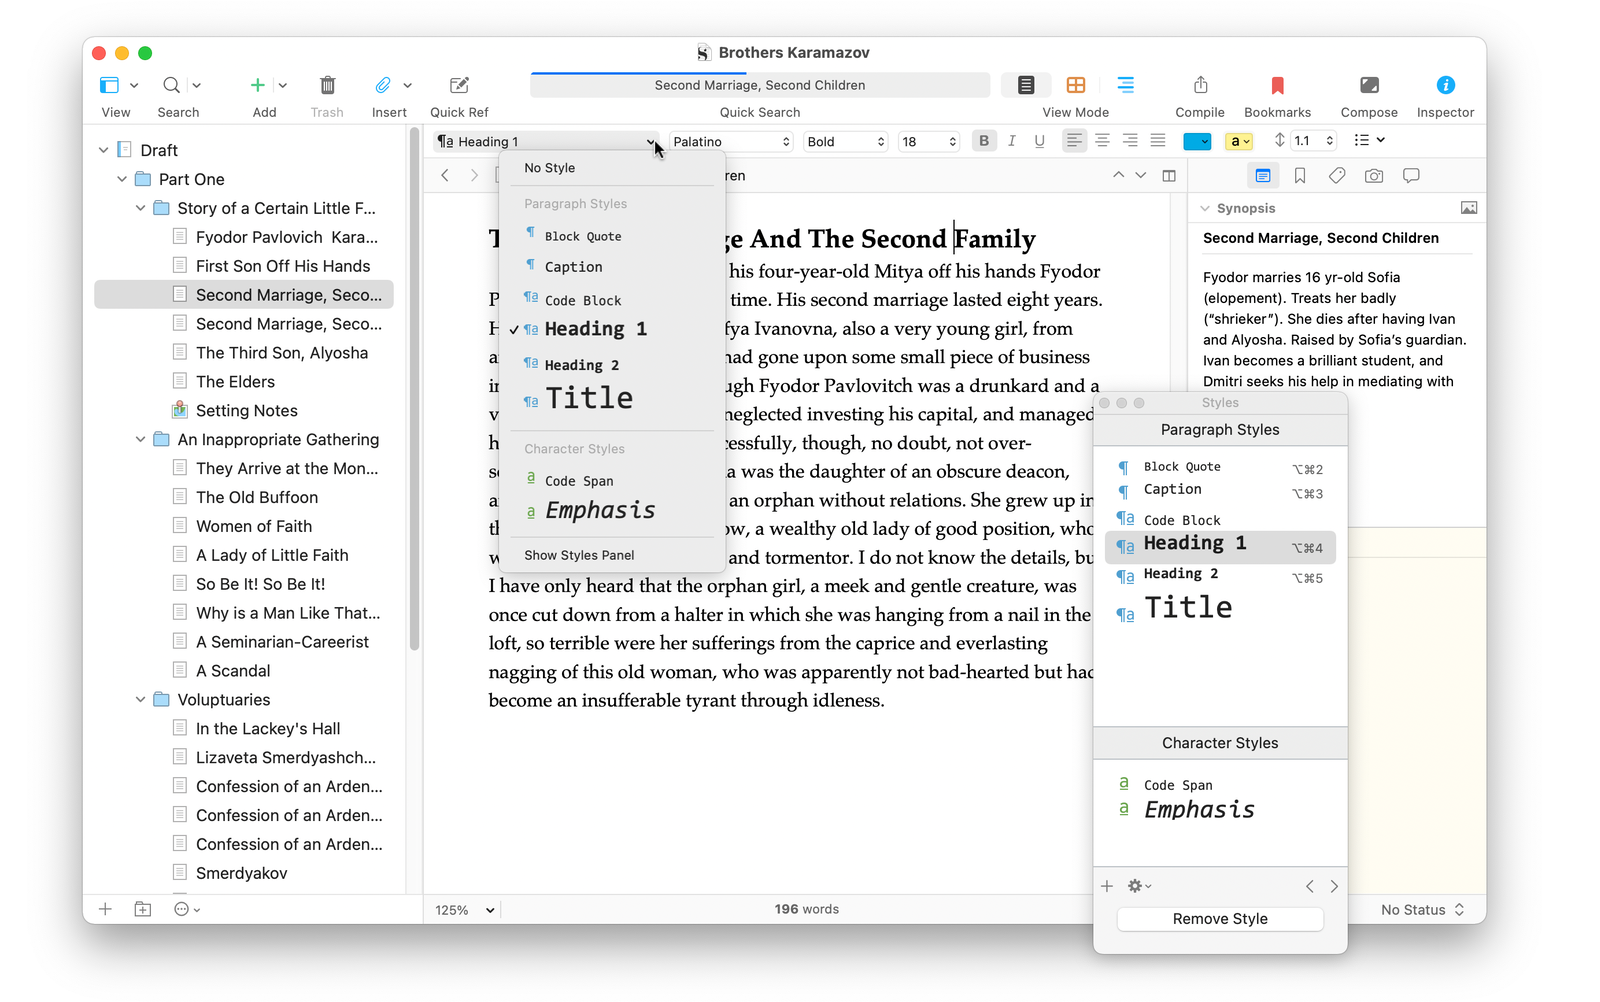
If you look closely, you can see that the cursor is positioned in the header of the document displayed in the Editor. In the Styles menu, the Heading 1 style has a checkmark next to it; in the Styles Panel, the Heading 1 style is highlighted. If I were to click in the paragraph below the header, the Styles menu would show that it's in No Style, which means it's using your default Editor formatting settings. (No Style does not display in the Styles Panel.)
The Styles Panel and menu show you whether styles are character styles, paragraph styles, on both. Character styles have a next to their names, paragraph styles ¶, and if a style contains both character and paragraph settings, you see ¶a.
You can use these styles to change the presentation of your text as you progress. In a new document, click Heading 1, then type your heading. Press Return, then start typing the body of your text, since that will switch to No Style, or your default formatting. When you want a new header, click Heading 1, if you want to insert a smaller header, click Heading 2, and if you want to include a block quote, click that entry in the Styles panel.
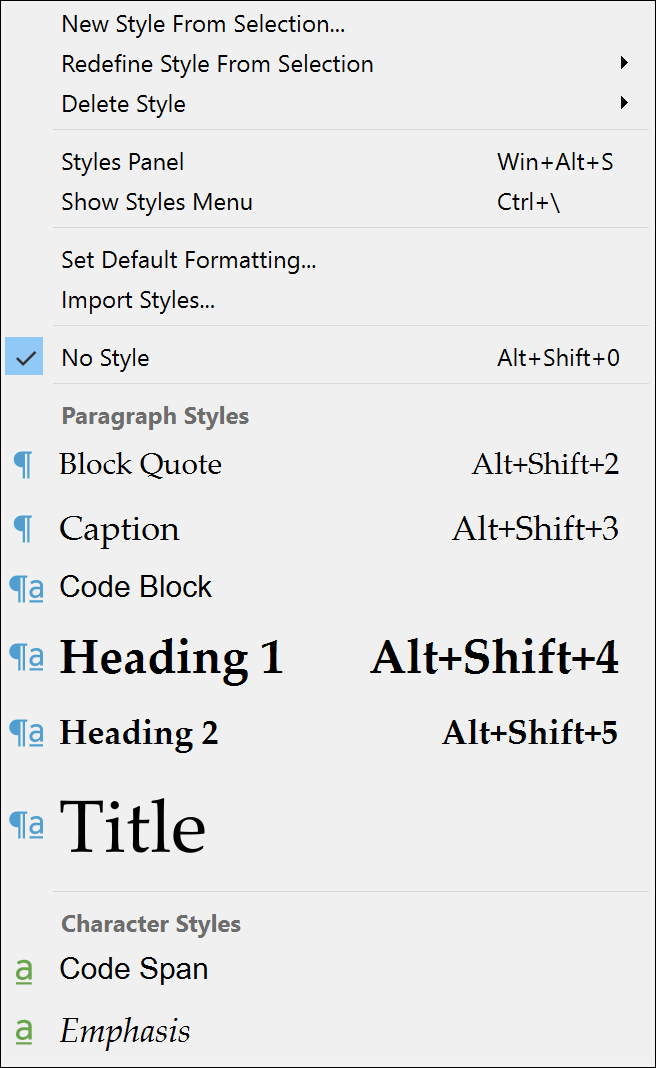
Tip: If you press ⌘-Shift-Y (Mac) or Ctrl+\ (Windows), the Styles menu appears above the currently selected text or where your insertion point is located. Unlike the Styles Panel, this menu disappears after you've applied a style.
You can see also that there are keyboard shortcuts in the Styles panel. You can press Command-Option-2 for Block Quote, Command-Option-3 for Caption, etc. On Windows, these shortcuts are not visible in the Styles Panel, but if you look in the Format > Style menu, you'll see that the shortcuts are Alt+Shift+2, Alt+Shift+3, etc.
Changing styles
One of the great things about styles is that you can apply them very simply. To apply a character style, select some text, then click that style name in the Styles Panel or menu, or press a keyboard shortcut. To apply a paragraph style, all you have to do is click anywhere in the paragraph you want to style, then choose the style. You can also select text to apply paragraph styles; for example, if you want to apply a paragraph style to all the text in a document, just select it all - Command-A (Mac) or Ctrl+A (Windows) - then choose the style.
Removing styles and formatting
As mentioned above, you often want to type text with no styles; this means it uses your default formatting settings. But this can also be the case if you copy text from, say, a web page or a document created in a different app, then paste it into a Scrivener document; this text has its own formatting, and unless you choose Edit > Paste and Match Style when you paste the text into Scrivener, it will retain the formatting as displayed in your web browser.
If you want to remove styles and/or formatting from any text, choose Format > Style > No Style, or press Command-Option-0 (Mac) or Alt+Shift+0 (Windows). This reverts the text to the default Editor settings.
Styles are a vast topic, and understanding and using styles efficiently can help save you a lot of time when you format your Scrivener projects, and make them more consistent. In future articles, I'll explain how to redefine styles, how to create your own styles, how to import and export styles from projects, and more.
You may also want to check out these 5 Tips for Customizing the Scrivener Editor.
Kirk McElhearn is a writer, podcaster, and photographer. He is the author of Take Control of Scrivener, and host of the podcast Write Now with Scrivener.