Quick Reference windows let you view a different part of your Scrivener project in a small window, in addition to what you see in the main Editor window.
Use Quick Reference Windows to View Multiple Parts of Scrivener Projects
A Scrivener project can be simple, with a couple of folders and files, or it can be quite complex, with chapters, scenes, character sheets, and research. The main Scrivener interface is designed to help you navigate and display these various elements, but the Editor generally only shows one item.
Sometimes you need to refer to other items in your project. You may want to keep tabs on your character sheets, either to ensure that your descriptions are consistent, or to add more information to them. If you store research in your Scrivener project, you almost certainly need to check details from time to time.
Scrivener lets you use Quick Reference windows to view any element of your project when you need it, without changing what's visible in the Editor. Here's how to use Quick Reference windows.
What is a Quick Reference window?
A Quick Reference window is a small window that you can display for almost any element in the Binder, that allows you to view a file in a stripped-down window, to check details, to update information, or more.
Quick Reference windows are not floating windows; they act as regular windows that you can minimize, reposition, and move to the background to work in the Editor. In addition, if you work with multiple displays, you can put several Quick Reference windows on one display, and work in the Editor on another. However, if you do want them to float - so they stay visible in front of other Scrivener windows - choose Window > Float Quick Reference Panels.
If you use a Mac, and are running macOS 10.15 Catalina or later, you can use Sidecar, a feature that allows you to send windows to an iPad, as a second display to view Quick Reference windows; see this Apple support document for more on Sidecar.
How to display Quick Reference windows
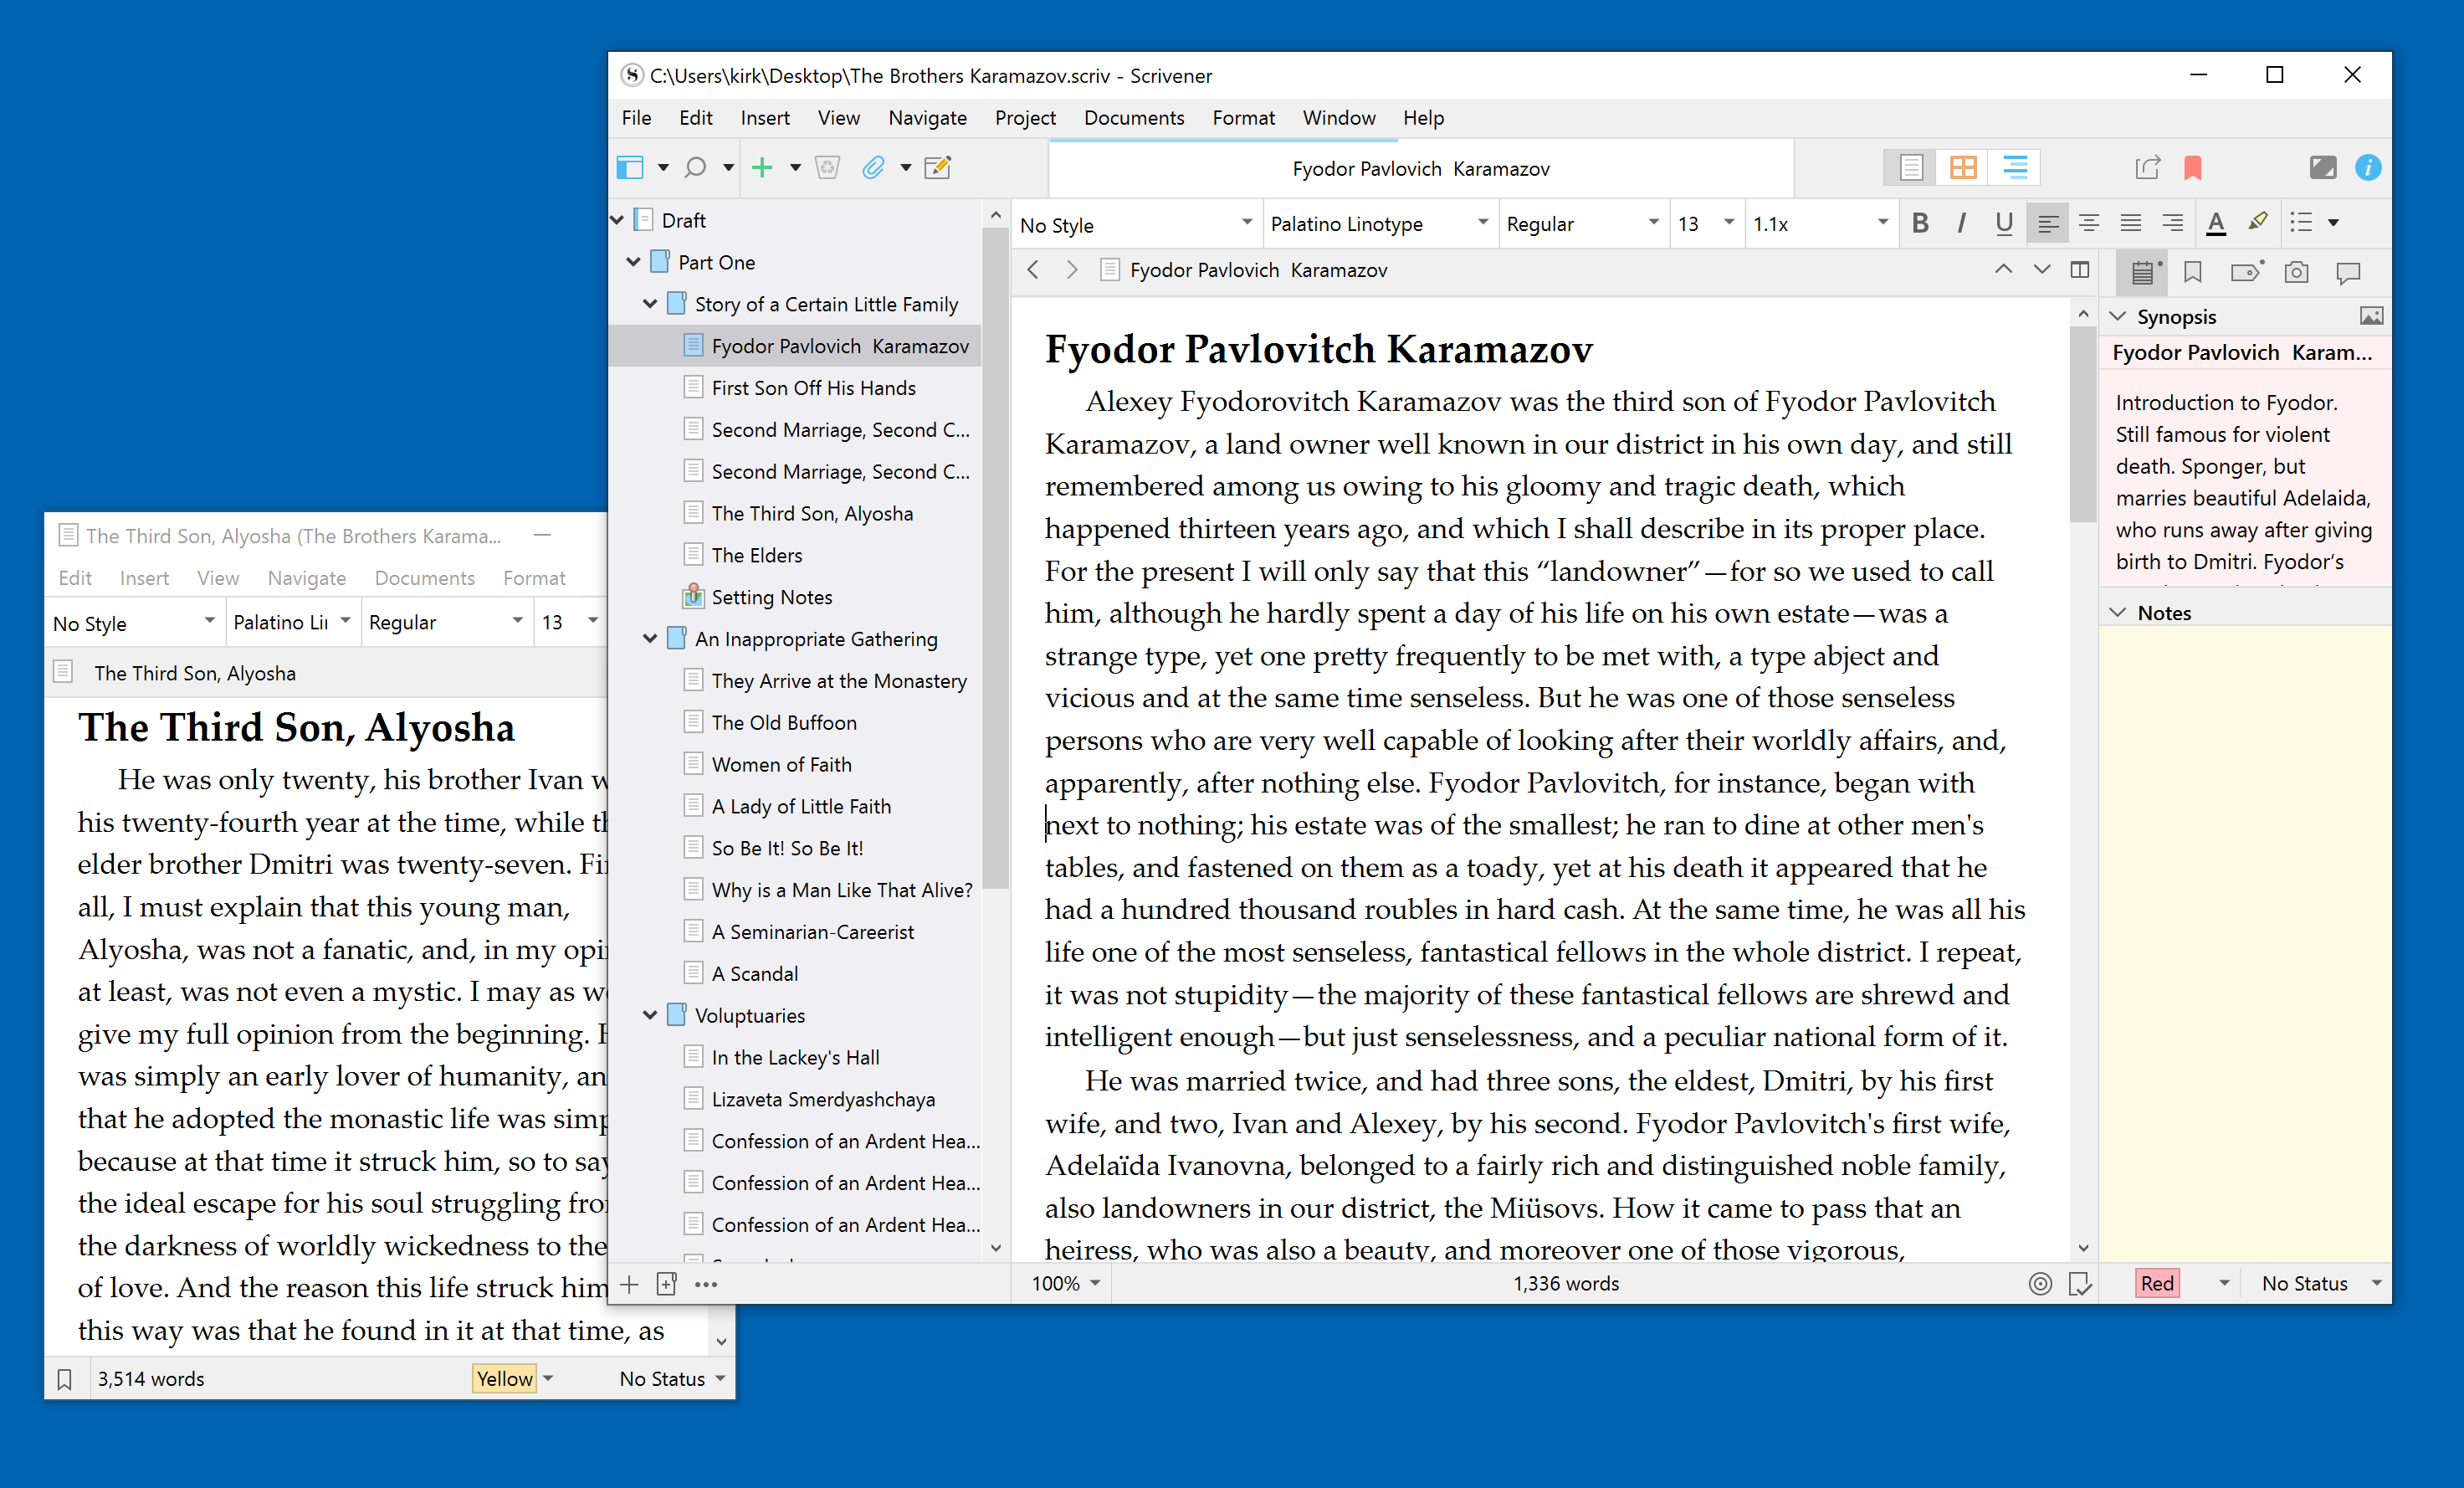
There are several ways to display Quick Reference windows. The first is the simplest: just select an item in the Binder and press the space bar. A Quick Reference window displays, and you can then click another item in the Binder to view it in the Editor, and position the Quick Reference window where you want.
You can display multiple Quick Reference windows like this. For example, if you want to display Quick Reference windows for all the texts in a section of your project, select the items you want to display, then press the space bar. All the items will open in Quick Reference windows, and you can reposition them as you want.
You can also display Quick Reference windows from Scrivener's Navigate menu. Select an item, then choose Navigate > Open > As Quick Reference. If you choose Navigate > Open Quick Reference, you can choose to open any element in the Binder as a Quick Reference window. You'll see a series of submenus for the Draft or Manuscript folder, Front Matter, character or location sketches, research, and everything else in your Binder. Just select an item to open it as a Quick Reference window.
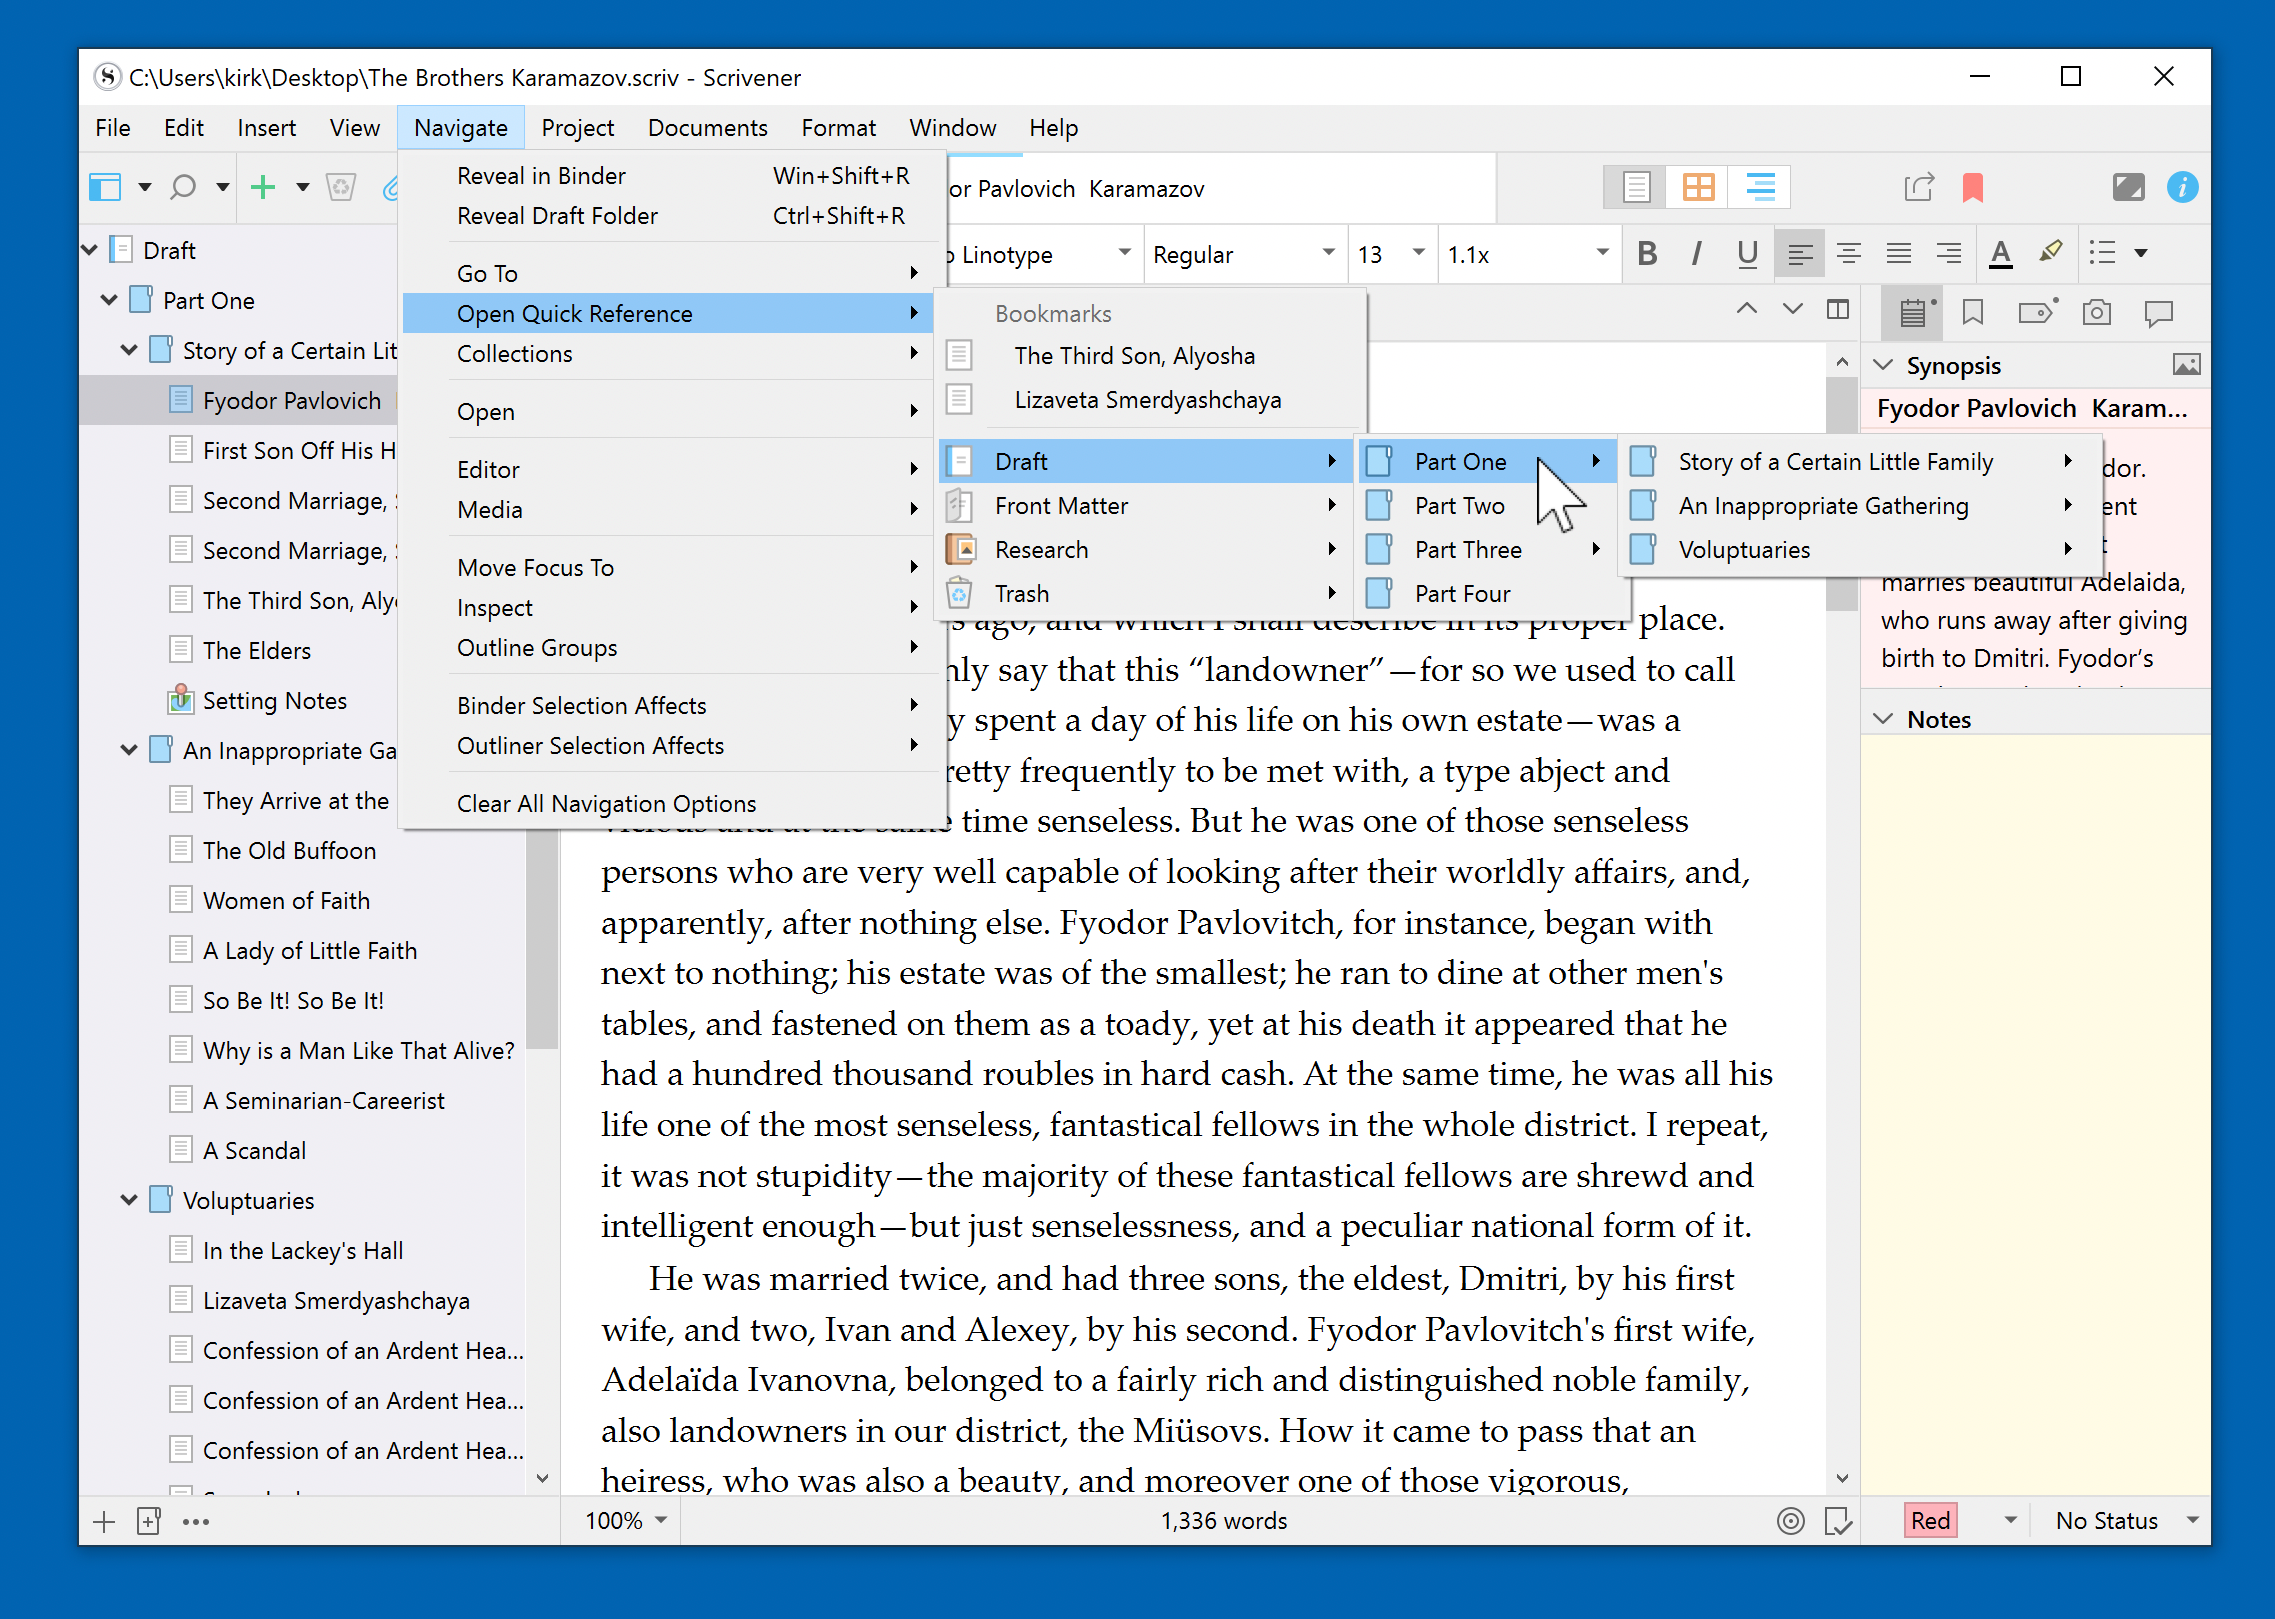
If you bookmark items in your project, you can quickly select them from the this menu; they display at the top. (To apply a bookmark, select an item in the Binder, then choose Documents > Add to Project Bookmarks.)
Customizing the Quick Reference window display
As you can see, the Quick Reference window is a stripped-down version of the Editor, and doesn't display the Binder or Inspector. You can access formatting options from the Format Bar and Header Bar at the top of the window.
Sometimes, instead of changing the font size, you may want to zoom a Quick Reference window. To do this, choose View > Zoom when the Quick Reference window is active. This can be useful if you're viewing content like PDFs in your Research folder. You can, of course, resize Quick Reference windows as needed to help see content like this.
The Inspector pop-up at the top right of the window allows you to display the different elements of the Inspector, one at a time. For example, if you want to view the synopsis for a file, you can click this menu - which, by default, says Editor Only - and choose Synopsis. The Inspector element you select displays at the bottom of the Quick Reference window.
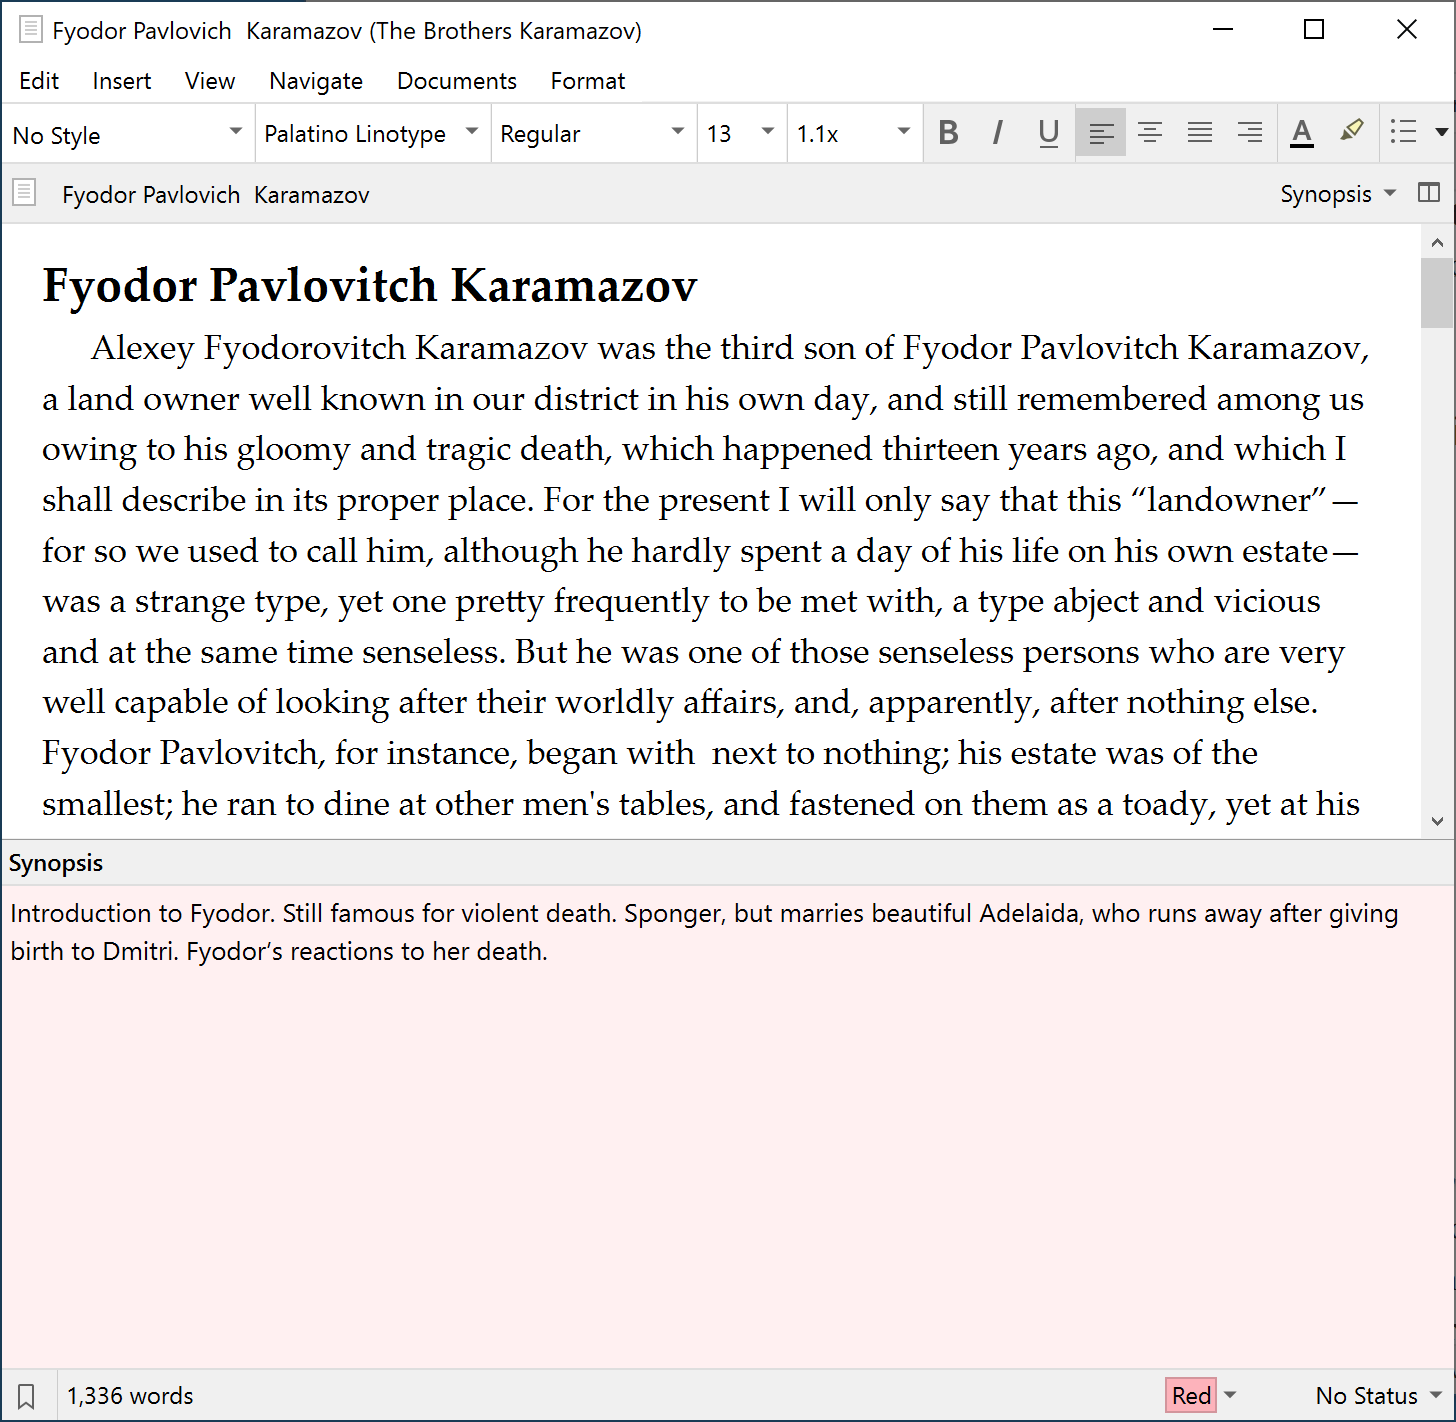
From this menu, you can choose Synopsis, Picture, Notes, Keywords, Bookmarks, Custom Metadata, or Comments/Footnotes.
Click the Bookmarks icon at the bottom left of the Quick Reference window to display a sidebar with bookmarks you've applied to elements in your project. This allows you to quickly change the contents of the Quick Reference window; just click a bookmark to display an item.

The footer of the Quick Reference window also gives you a word count for the item you're viewing, and lets you apply labels and statuses.
You may find it practical to use Quick Reference windows to keep an eye on different parts of your projects. Try them out; they can save you a lot of time and navigation.
Kirk McElhearn is a writer, podcaster, and photographer. He is the author of Take Control of Scrivener, and host of the podcast Write Now with Scrivener.