Scrivener's Binder icons give you lots of information. Understanding these icons can help you better manage your projects.
What Do the Icons in Scrivener's Binder Mean?
Scrivener's Binder is the nerve center of your writing projects. It organizes the many elements of your project in a familiar metaphor of folders and files. Various icons in the Binder, which is the left sidebar in Scrivener, help you see, at a glance, what these elements are.
There are lots of icons in the Binder, and in this article I'm going to show you what the different icons mean.
Binder icons
The Binder contains folders and files, and each of these items contains part of your project. Files contain text, and folders contain files; that's the basic usage. But folders can also contain text; see Use Folders and Texts to Power Up the Scrivener Binder for more on this.
Icons in the Binder show you which items are folders and which are text, and variants of these icons give you more information about each item.
Below are Binder icons for Mac (left) and Windows (right). You can see that they are the same, except for folders, which are horizontal on Mac and vertical on Windows.
Here's what each of these icons means.
- Manuscript: this is the top-level folder, which is called Draft or Manuscript, depending on the template you've used. You can change this, if you want, to the title of your project.
- Chapter 1: This is a basic folder.
- 1: This is an empty file; it contains no text and has no synopsis.
- 2: This is an empty file with a synopsis. You may have icons like this if you have outlined a project, adding synopses, but not started writing any text.
- 3: This is a file containing text, and that has sub-files; you can nest files in folders, and files below files.
- 4: This is an empty scriptwriting file.
- 5: This is a scriptwriting file that contains text.
- Chapter 2: This is a folder with a synopsis.
- 1: This is an empty file with snapshots. See How to Manage, Compare, and Restore Snapshots in Your Scrivener Projects to learn how to use snapshots.
- 2: This is an empty file with a synopsis, and with snapshots.
- 3: This is a file containing text, and which has snapshots.
- 4: This is a file containing text, and sub-files, and which has snapshots.
- Chapter 3: This is a folder that contains text. Not files, but text that is part of the folder itself.
There are other icons, below the section of the Binder that contains basic folders and files. These don't change according to their content or snapshots.
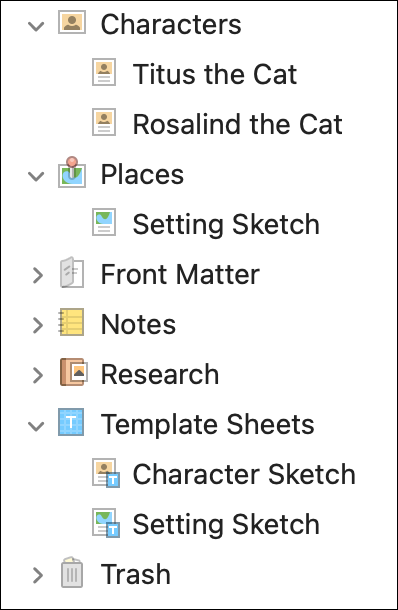
Above, you see the Characters folder, with two character sketches; the Places folder, with one setting sketch. You can create as many items as you want in the Characters and Places folders, using template sheets you see near the bottom of the screenshot above. See How to Manage Your Characters in Scrivener for more on managing characters.
Front Matter is a special folder designed to hold content for compiling your project as a book, Notes is a place to store notes, and Research is a special folder that holds many types of files you may use when researching your project. See Use Scrivener's Research Folder to Store Information About Your Project.
Finally, the Trash folder works like the macOS Trash or Windows Recycle Bin; it holds items you delete from the Binder, but haven't yet deleted from the project. Choose Project > Empty Trash to delete items in that folder.
Changing Binder icons
In addition to the above icons, there are dozens of icons that you can use in your projects. In Personalize the Scrivener Binder with Custom Icons we explain how you can change icons for any items in the Binder.
Custom icons can make navigating the Binder easier if you have lots of folders and files, and are especially useful if you want to mark items to remind you of what happens in certain scenes, where or when they take place, or which characters are in them.
You can use the built-in icons, some of which you see above, and you can also import your own images to use as custom icons.
Kirk McElhearn is a writer, podcaster, and photographer. He is the author of Take Control of Scrivener, and host of the podcast Write Now with Scrivener.