When you've decided how you want your Scrivener projects structured, it's easy to save them as templates so you can use them for other projects.
Create Custom Templates for Your Scrivener Projects
When you work with Scrivener, you use projects, which are packages or folders of files, containing the various elements of your writing work. These projects are what allow Scrivener to offer a full writing environment, with separate texts for chapters or scenes, character and setting sheets, and folders for storing research elements.
You can use one of Scrivener's default templates, or you can customize your own; this is especially practical when you've gotten the Scrivener layout exactly how you like it, and want to use the same project settings in the future. Here's how to create custom Scrivener project templates.
Choosing a template
Scrivener comes with more than 20 project templates, which you see when you launch the app for the first time, or when you choose File > New Project. These are sorted in several categories, such as fiction, non-fiction, etc.

You can choose any of these templates to start working on your project, and you can make changes to these projects as you progress, so you're not locked into a specific structure.
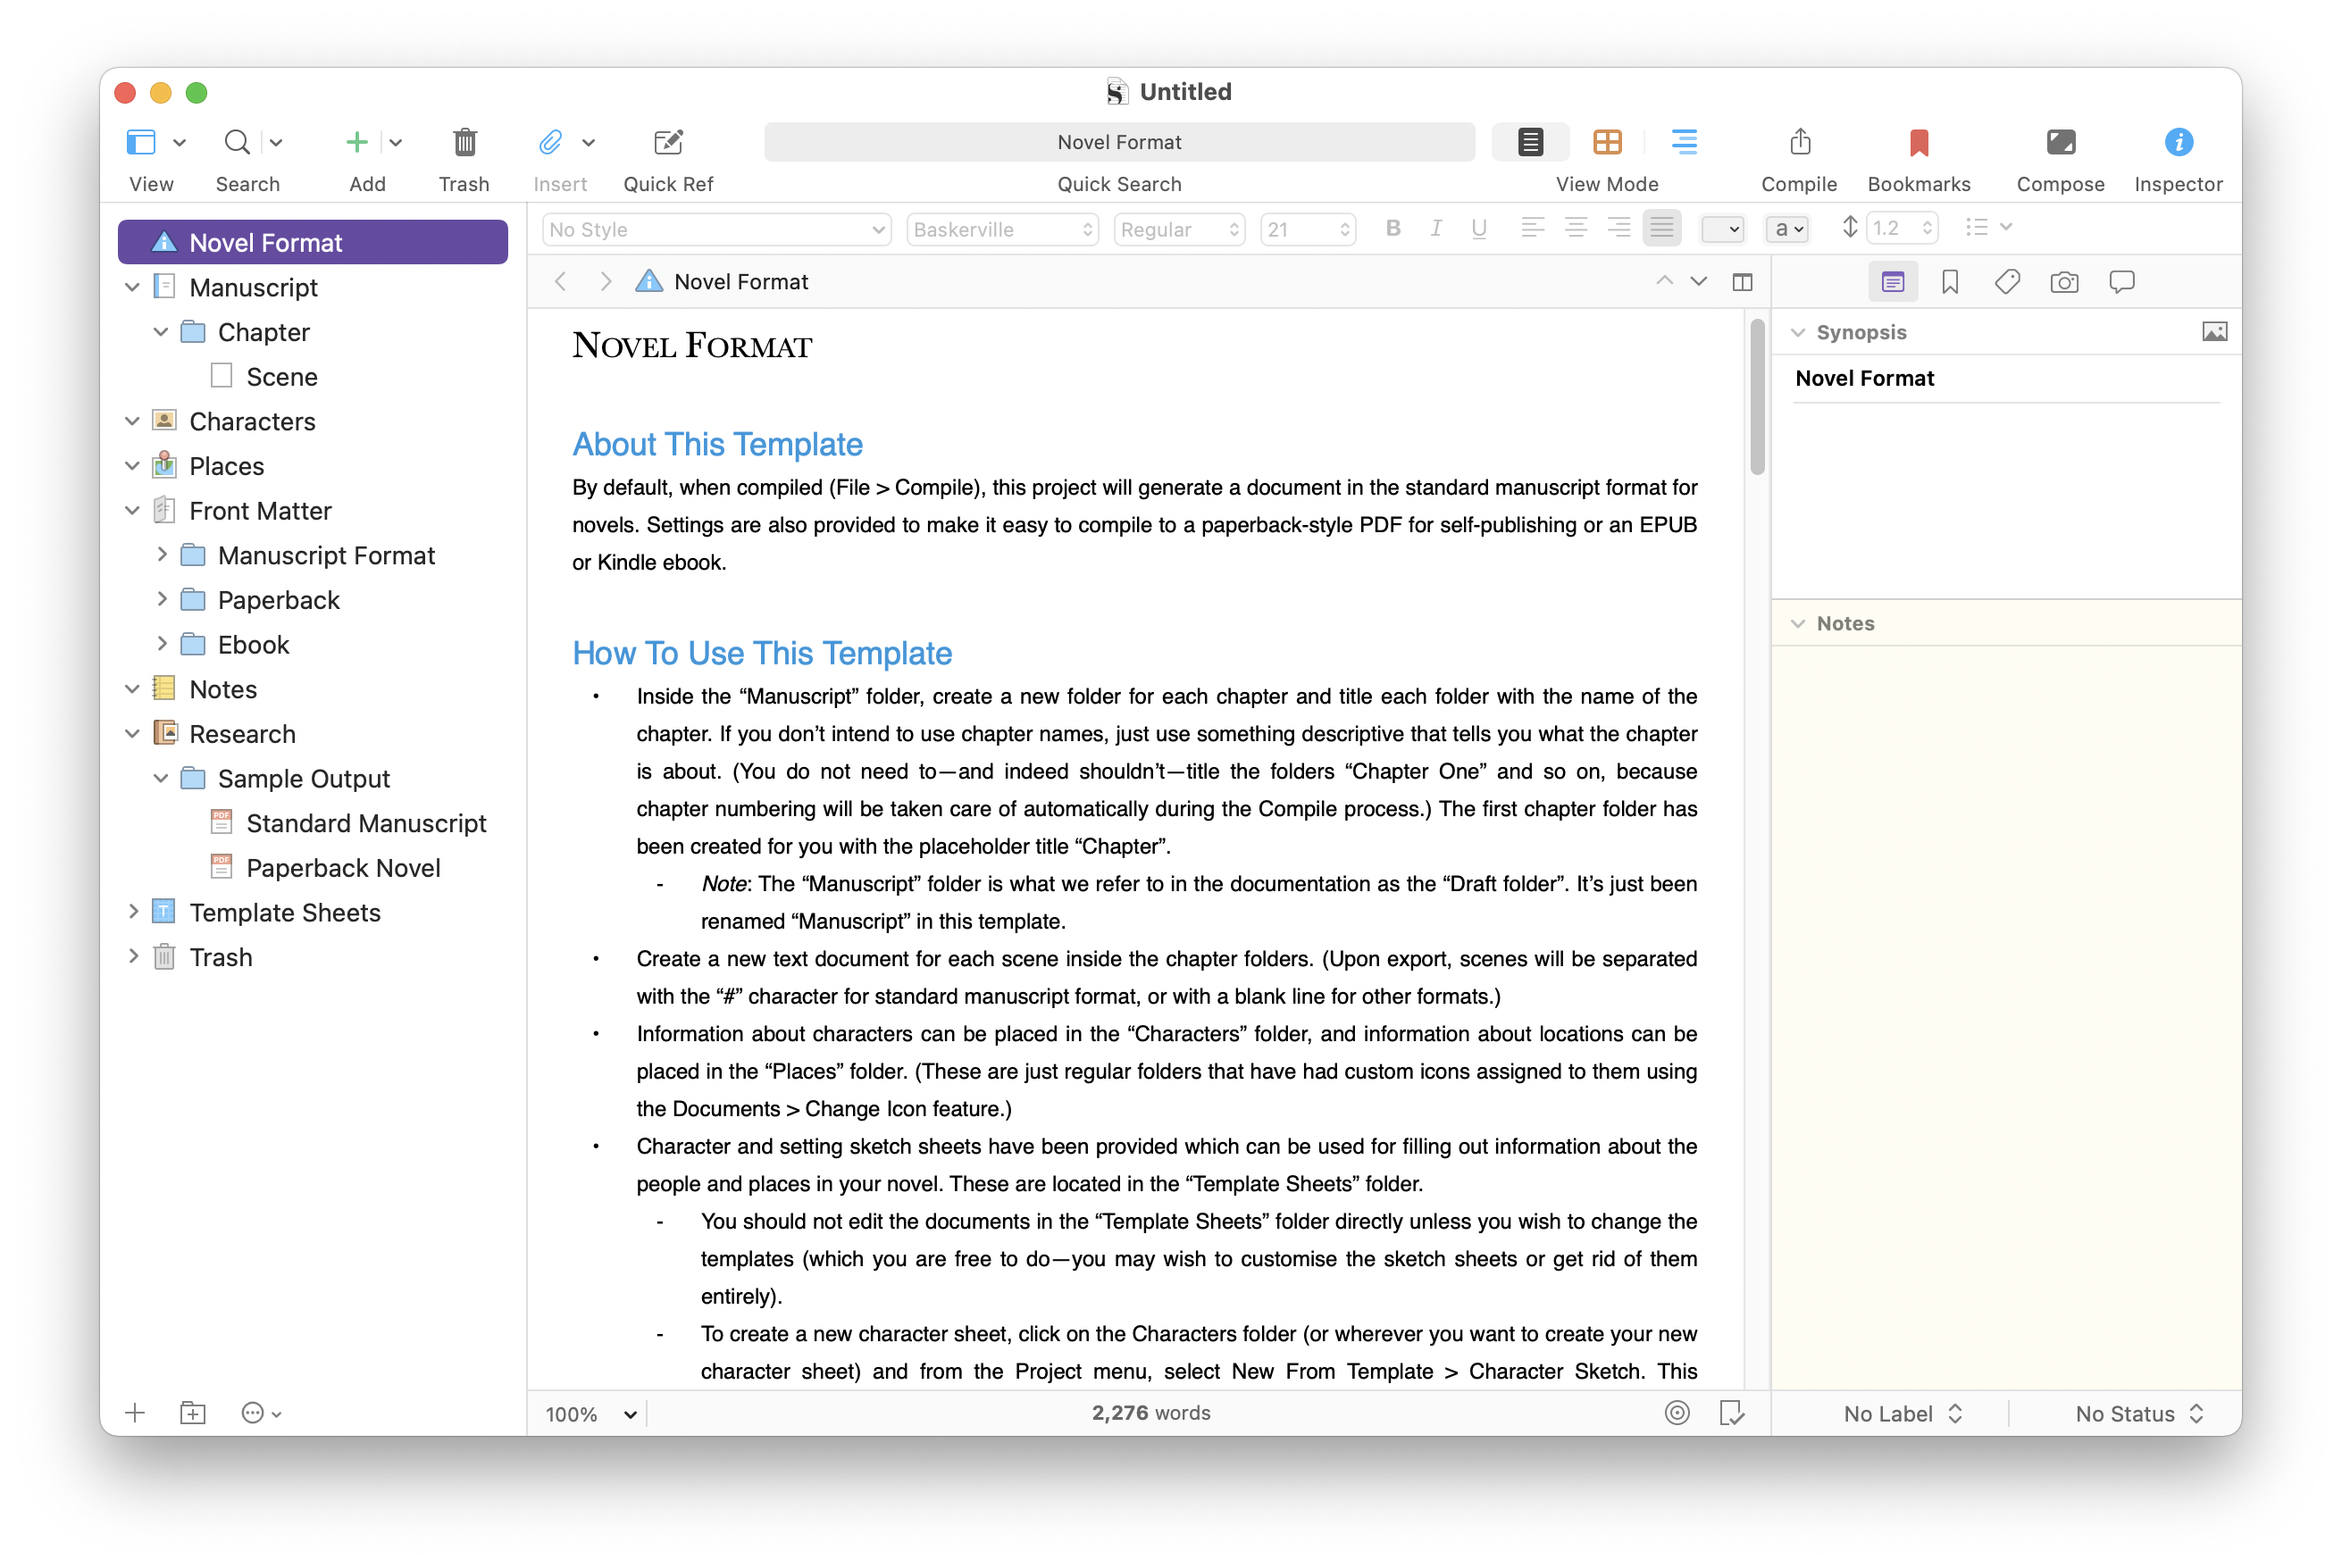
Here's the Novel template, which you can use for novels or other types of projects:

This template is good for many types of long works, offering a folder for the entire manuscript, a sample folder for the first chapter, and a sample text for a scene. You create more folders and texts in the Binder as you progress, and you can use other folders to store character or settings sheets, front matter to use if you compile your project to make an ebook, notes, research folders, and more.
Customizing your project
As you move ahead with your writing, you may find that you want to change this structure a bit. Instead of writing multiple scenes in a chapter folder, you may want a single text for each chapter. You may want sub-folders for your research. And you may not need the front matter folder, because you don't plan to compile your own book, but rather you'll be compiling your project to send to an agent or editor.
You can delete items or add items in the Binder as needed; we discuss how to work with folders and texts in the Binder in this article.
Making your own template
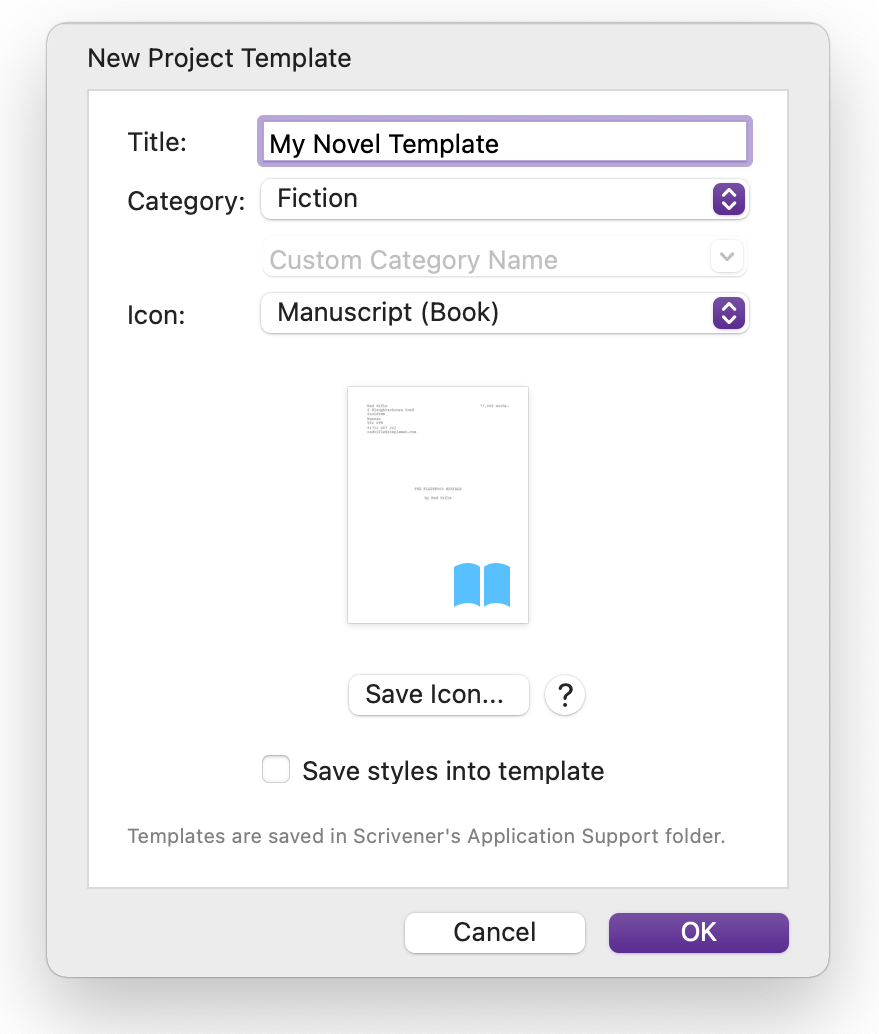
Changes you make to the structure of the project are saved as you work, and you may find, when you've finished with a project, that you want to use the same settings and Binder layout for your next work. You can save any project as a template to use later. To do this, choose File > Save as Template. Scrivener presents this dialog:

In this dialog, you have the following options:
- Title: Enter a title for your template, which will display in Scrivener's Project Templates window.
- Category: This is the category where the template will appear in the Project Templates window. If you don't like the built-in categories, choose Custom from the Category menu and enter your own category name.
- Icon: There are dozens of icons available; you can see some in the Project Templates window screenshot above. If you don't like them, scroll to the bottom of the Icon menu and choose Choose, and select an image file to use as your template icon.
- Save Styles into Template: If you have created paragraph or character styles, you may want to save them to the template so you can reuse them.
Note that once you've saved a project as a template, you can and probably should keep the original project, which you might want to archive, if that project is completed.
What gets saved in a template
When you save a project as a template, everything in that project gets saved. This includes folders and texts in the Binder, character and setting sheets, project bookmarks, custom labels, collections, and more. All the settings you've saved for your project will be copied into the template.
Saving a custom template like this is ideal if you're writing a series: you can have all the character and setting information for your main characters and locations ready when you begin a new work. Your research will carry over to the template, as will the front matter and back matter, notes, and every other element of the project.
But since you probably don't want everything from your project in the template, you might want to cull those elements that you won't need in the future.
TIP: Before you start culling elements, you’ll almost certainly want to create a copy of the project. You are then safe to delete from the copy everything you don’t need in the template and can create the template from that. To do so, go to File > Save As… and save your project with a new name. You’ll now be working on the copy of the project with the new name and the original project won’t be affected by the changes you make next. (You can reopen the original project at any time from File > Recent Projects.)
You can now delete the folders and texts in the Binder that you won't reuse in the next project, but you might want to leave one folder named Part One or Chapter One, and one blank text in that folder, as starters. Delete any research that is specific to the previous project, but leave research that you'll need for other parts of your series.
When you've made these changes, choose Project > Empty Trash, to delete the culled items from the project, then choose File > Save as Template again. You'll see the same new template dialog as above. Click OK to save it, and Scrivener will ask if you want to replace the existing template with the same name. Click Replace. (You could, of course, rename it, such as My Novel Template - Revised if you want to keep both.)
Sharing templates
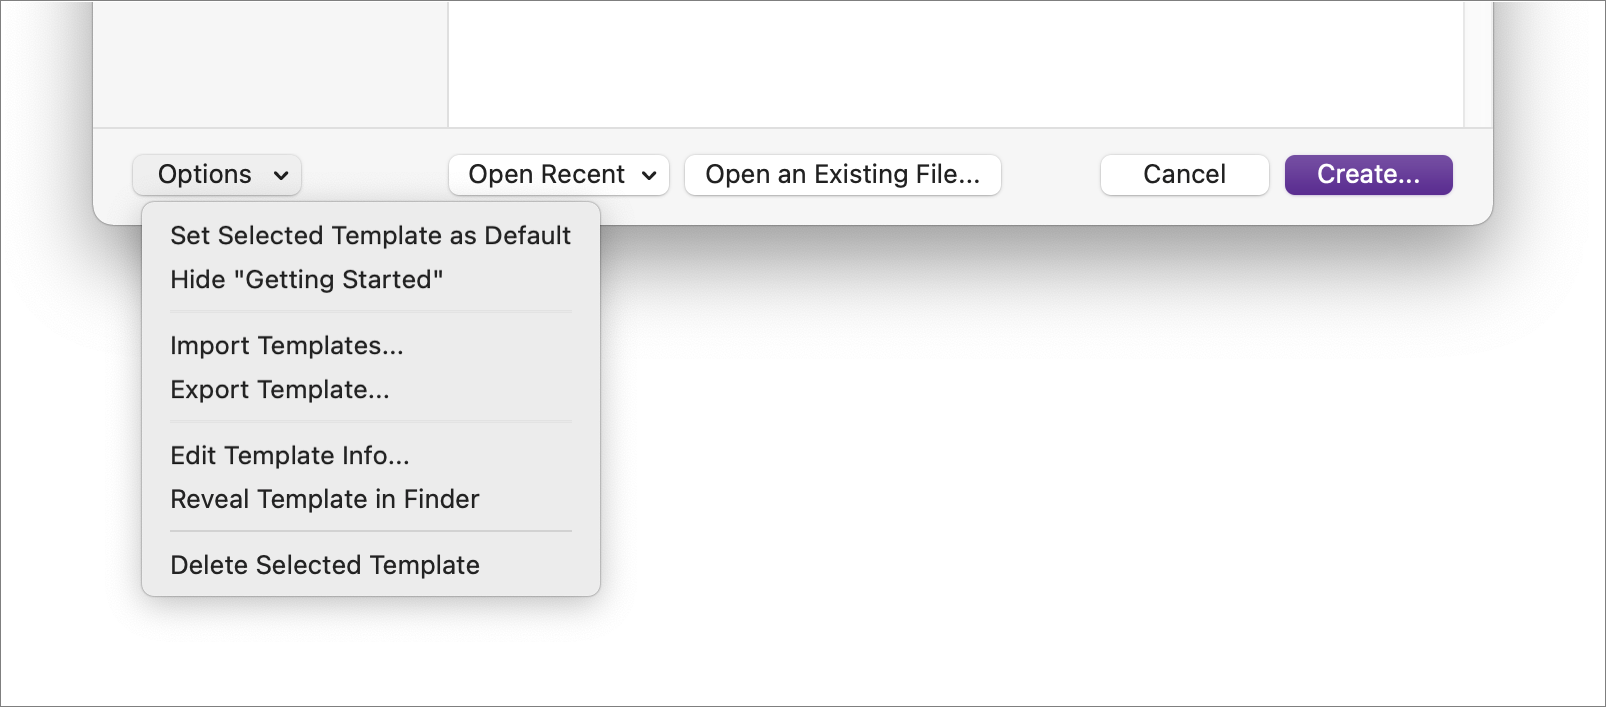
You may want to share your templates with other writers, or you may want to use templates that others have created. If you select a template in the Project Templates window, then click Options, a menu allows you to work with that template.

- If you Set Selected Template as Default, the Project Templates window will open with this template highlighted in the future.
- If you Hide Getting Started, this hides the Getting Started category in the Project Templates window.
- If you select Import Templates, you can select a template that you received from someone else and import it so you can use it.
- You can Export Template if you want to send a template to another writer.
- Choose Edit Template Info to modify the template's title, icon, category, and more.
- If you choose Reveal Template in Finder, Scrivener will show the template file in the Finder (Mac) or File Explorer (Windows).
- And you can choose Delete Selected Template if you no longer want to use this template.
Customizing templates allows you to save time on your next project. It's especially practical if you're writing a series, have repeated elements in projects, or just want all your projects to look the same.
Kirk McElhearn is a writer, podcaster, and photographer. He is the author of Take Control of Scrivener, and host of the forthcoming podcast Write Now with Scrivener.

