OPML is a file format used by many outliners. You can import OPML files to you Scrivener project, and export all or part of your project in that format.
Import and Export OPML Outliner Files to Scrivener
Scrivener is designed to be a one-stop shop for planning, writing, and revising long works. But it also allows you to import files from many different apps, in case you have done preparatory work outside of Scrivener. You can import and export Microsoft Word files with Scrivener, importing individual .doc or .docx files to add to your project, and exporting all or part of your project in that format. You can also import plain text files (with .txt, .md, or other extensions), RTF files, and many others.
One type of file format you can import into Scrivener is OPML, or Outline Processor Markup Language; this format is used by outliners and mind-mapping tools. You can also export OPML files to open them in other apps or to add to a Scrivener project. Here’s how.
Why OPML?
OPML dates back to the early 2000s and was designed as a way to create files containing simple hierarchical data that is easy to browse and edit. It is based on XML (Extensible Markup Language), which is similar to HTML, the language used for web pages. Like XML and HTML, it is human-readable; it is not computer code, and it works with tags specifying the attributes of different elements. Dozens of outliner apps support OPML, and Literature & Latte’s Scapple can export OPML files.
While you can use Scrivener’s Outliner to prepare the outline for your project, you may want to import OPML files if you’ve built up an outline in another program, or if you’ve been collaborating with others on an outline. It’s not uncommon for some types of writing - non-fiction, technical documents, etc. - to be prepared in outlines by several people before a writer gets to work. Being able to import that outline allows you to do your preparatory work with others, and write in Scrivener. Or you may have an outlining app that you like, and want to plan your project in that app before diving into the actual writing.
How to import OPML files to Scrivener
To import an OPML file, choose File > Import > Files… and select the file you want to import. Files that Scrivener cannot import are dimmed; all other files can be imported. Scrivener determines the files it can import according to what you have selected in the Binder. If you have selected the main Draft folder or any of its contents, Scrivener can only import files containing text, such as .doc or .docx, .rtf, or .txt files. If, however, you select the Research folder, Scrivener can import all sorts of files, including audio, video, and images.
When you import an OPML file, Scrivener splits it into lines, as displayed in the outliner app where it was created. If you select a folder in the Binder and import an OPML file, Scrivener creates new files at the bottom of that folder, one for each line of the OPML file. Since OPML files can contain basic outline entries, which correspond to what you see in the Binder, as well as attached text (often called notes). This attached text is inserted into the Binder text files, and you can view it in the Editor. These notes could even be the text from another Scrivener project; see below.
Scrivener has settings for importing OPML files. Go to Scrivener > Settings (Mac) or Scrivener > Options (Windows), click Sharing, then look at the OPML section:

- Import outline into main text: this imports the outline into the text of the selected file, rather than adding it to the Binder.
- Import notes into…: this lets you choose whether the “notes” from the outliner get added to the Synopsis, Main Text, or Notes.
- Create folder to hold imported OPML items: this creates a new folder for imported OPML items, rather than adding them to the selected item in the Binder.
How to Export OPML Files from Scrivener
Scrivener gives you lots of options when you export a project as an OPML file. Choose File > Export > OPML File…, and you’ll see a dialog offering multiple ways to export your project.
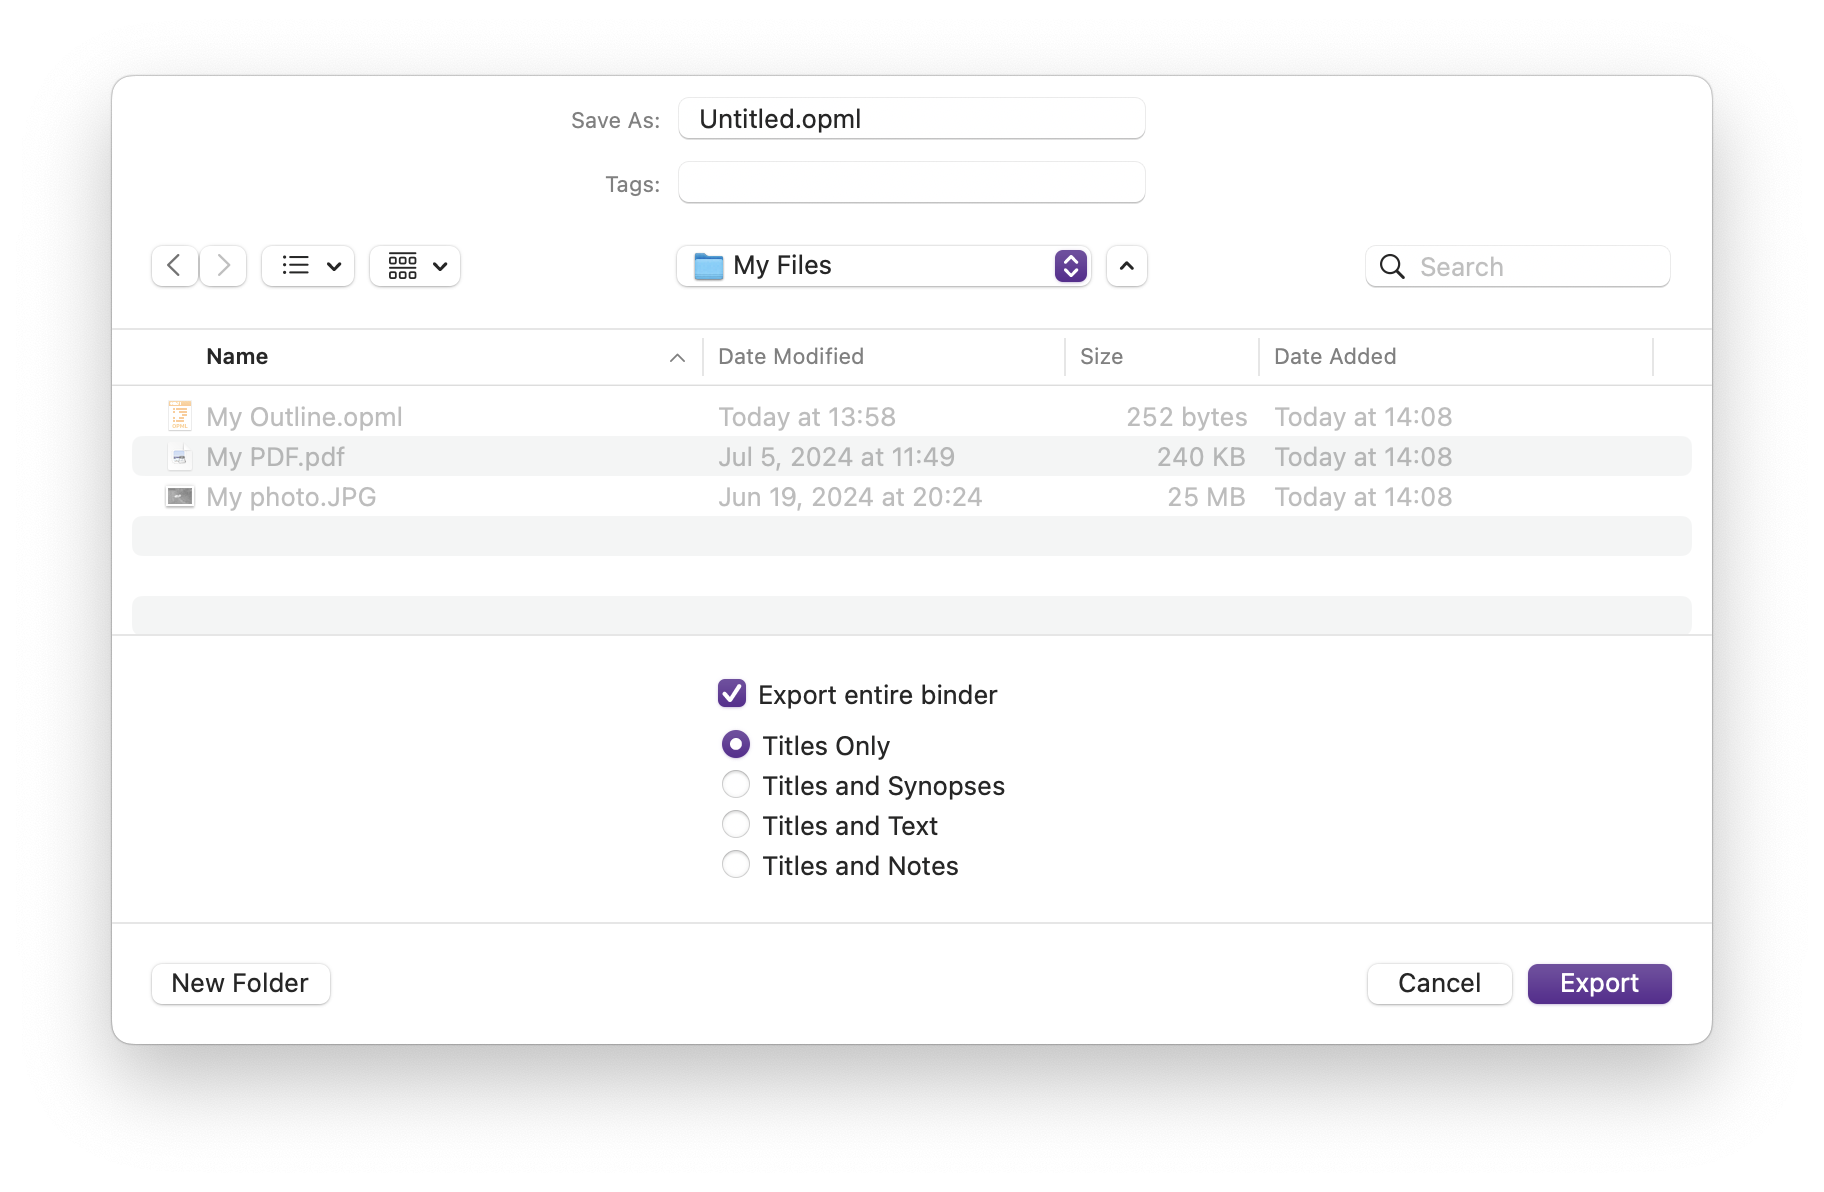
You can choose:
- Titles Only: this exports the titles of folders and files in the Binder.
- Titles and Synopses: this exports titles of folders and files in the Binder, as well as synopses, if you have created any in the Outliner, Inspector, or Corkboard.
- Titles and Text: this exports titles of Binder items, as well as their text in the Editor.
- Titles and Notes: this exports titles of Binder items, as well as any notes you’ve created in the Inspector.
A checkbox lets you choose to Export entire Binder; this means that no matter what you’ve selected in the Binder, the OPML file will contain everything, including text not in the Draft folder, such as in the Front Matter section or Research folder. If you don’t check this, Scrivener only exports the selected Binder items: if you select one or more text files, Scrivener exports them; if you select a folder, Scrivener exports that folder and its contents.
An OPML file is a good way to share part of your Scrivener project, such as if you’re working with a critique partner, where you want to exchange all or part of your project’s text with someone who will import it into their copy of Scrivener. You won’t be sharing the entire project; just the sections you want to share.
The same is true when importing an OPML file. You may have a Scrivener project with sections that you’ve cut, but that you want to insert into a new project. Select those sections, export them as OPML, then import them into a new project.
Kirk McElhearn is a writer, podcaster, and photographer. He is the author of Take Control of Scrivener, and host of the podcast Write Now with Scrivener.
0 Comments
Please sign in or register to comment on this post.
Register
Sign in
Forgotten password