Scrivener lets you save bookmarks to items in your project, as well as external files.
Use Bookmarks in Scrivener Projects to Link to Internal and External Files
Your Scrivener project is a container for a lot of things. It contains your manuscript, with its files, folders, and sub-folders, but it also contains elements like character and place documents, research, front and back matter, and more. Rather than thinking of it as a file, you should think of it as a package.
If you store a lot in your Scrivener project, especially if you have a lot of research, it can get very large, making it harder to move around and back up.
In this article, I'll tell you how you can use bookmarks to link to items in your projects, to access them easily, and how to link to files on your computer but not add them to your Scrivener project.
All those files...
Many writers using Scrivener just write; they don't do a lot of research, and their projects contain nothing more than text. But some writers take full advantage of Scrivener's Research folder, where you can store all sorts of documents to help you as you write.
You can import all kinds of files to the Research folder to later view them in Scrivener: text files, PDFs, graphics, audio files, videos, and more. You can find a full list of file types in the Scrivener manual, chapter 9.1. (Choose Help > Scrivener Manual to view the manual.) In fact, you can add any type of file to the Research folder, even if Scrivener cannot display its content.
But if you store a lot of research in your project, the file can get very large. It's not uncommon for people to have projects that are in the hundreds of megabytes, or even several gigabytes; add a few videos, and its size balloons. This can make it harder to sync your project to the cloud, and to back it up. Project bookmarks allow you to link to files that you don't need to store in your project, but want to be able to access easily.
How to add bookmarks
Scrivener offers two types of bookmarks, document bookmarks and project bookmarks. You can manage and view them in the Inspector; click the Bookmarks icon to see its contents.
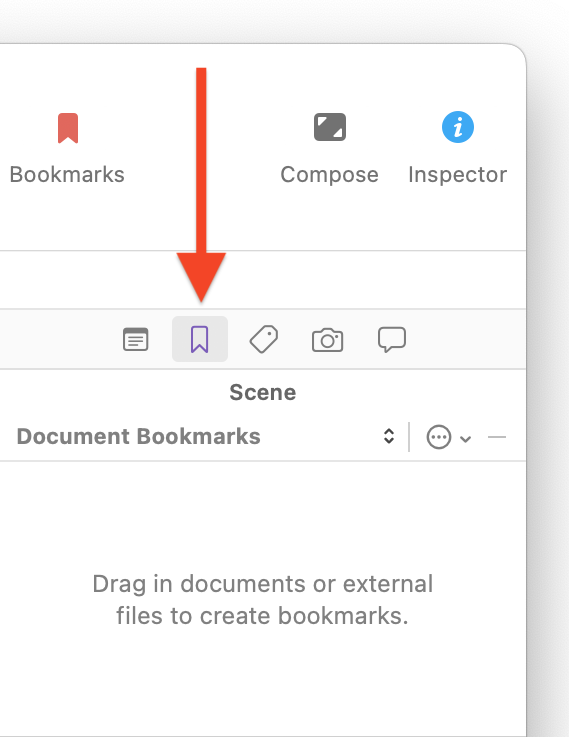
When you first click the Bookmarks icon, you see Document Bookmarks. A text in the Inspector tells you that you can drag documents, external files, or web links to this area to add them as bookmarks. If you click a bookmark, depending on the type of content, you may see its contents:
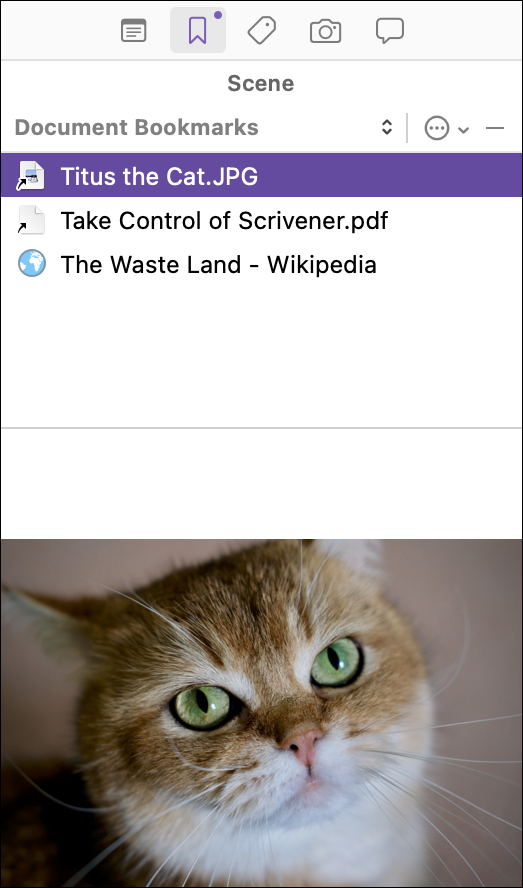
You see thumbnails for photos, cover pages for PDF documents, and for links to websites you see a Load Web Page button; click this to open the page in your default browser.
You can also add and manage bookmarks from the Bookmarks Option menu. Click the ... icon, and a menu displays:
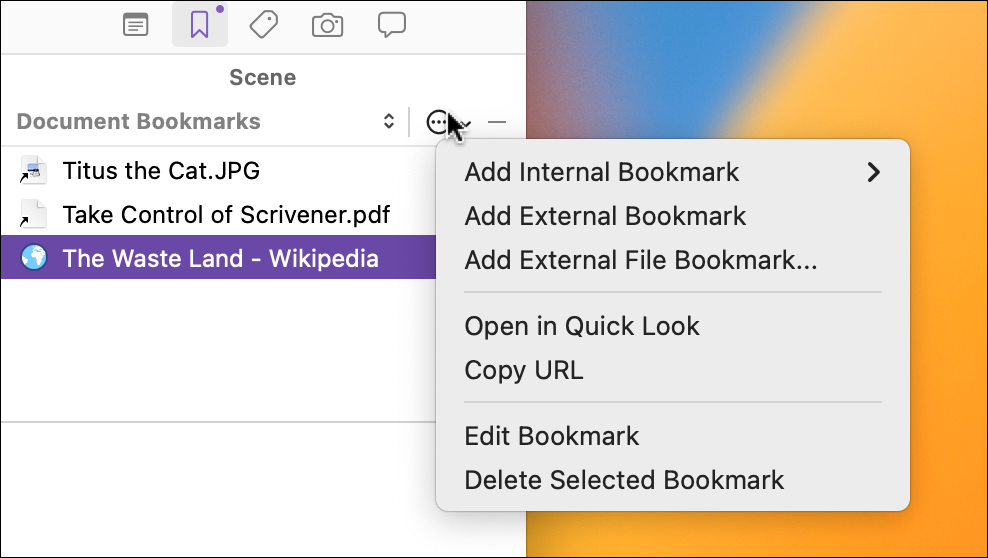
As you can see, this allows you to do the following:
- Add Internal Bookmark. If you click this menu item, you can choose any element in your Scrivener project as a bookmark.
- Add External Bookmark. Click this and Scrivener displays a small popup dialog where you can enter a title and a URL to save a bookmark for a web page.
- Add External File Bookmark. Choose this, and Scrivener displays a dialog allowing you to select any file on your computer, and even on a network volume connected to your computer.
In the above screenshot, I've selected a web bookmark. The Bookmark Options menu allows you to also open the bookmarked item in a Quick Reference window, and view it in Quick Look if you're on a Mac. You can copy the URL to paste it or use it elsewhere, you can edit the bookmark, and you can delete the bookmark.
If you've selected a file that Scrivener can display, such as a text file or PDF, you'll see some or all of that file in the Inspector, and you’ll see options to open the file in the current editor or in another editor, view on a copyholder, and reveal the file in the Mac's Finder (Reveal in Finder) or in the Windows Explorer (Open File Location).
Document and project bookmarks
In the above examples, I added bookmarks to a specific document in my project. When I view that project, and click the Bookmarks icon in the Inspector, I see those bookmarks, but I don't see them when viewing any other document. Because of this, there is another option for saving bookmarks: project bookmarks.
If you click Document Bookmarks, a popup menu lets you choose Project Bookmarks. Select this, and you see the following:
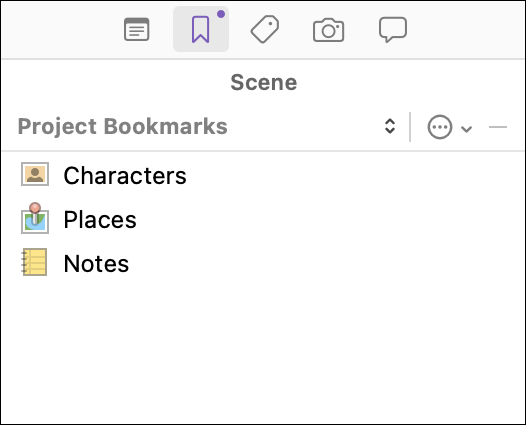
These preset bookmarks are available in the default Fiction template; other templates may contain different bookmarks, or none at all. These bookmarks give you quick access to the Characters, Places, and Notes sections of your Binder. Click one of them to see the character or setting sketches you've created, and select one to view it in the Inspector.
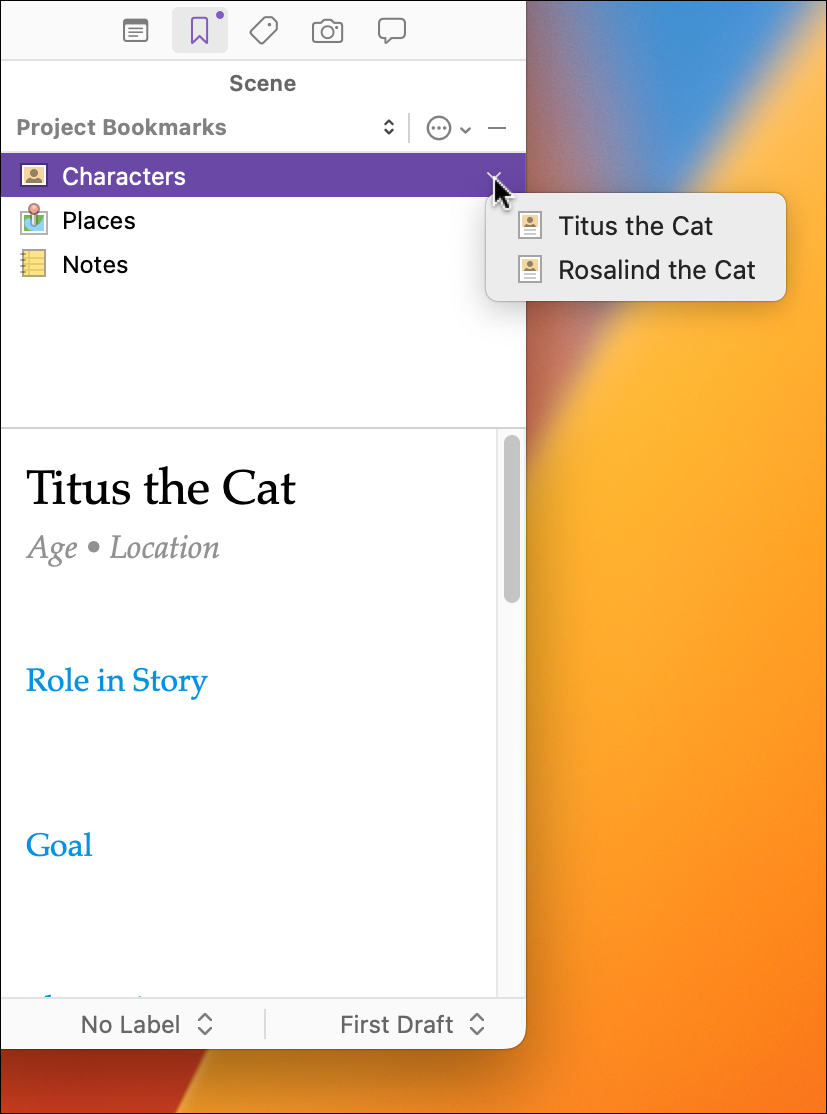
Click Notes to see your project notes, and double-click Notes to open your notes in a small window. If you've created documents in the Notes folder, then they will show up when you click Notes in the Inspector, as with the Character and Places bookmarks.
Adding bookmarks to project templates
While Scrivener comes with a number of templates for fiction, non-fiction, screenplays, and more, you can also create your own templates. See Create Custom Templates for Your Scrivener Projects to find out how to do this.
You can use bookmarks in your custom templates so they are available each time you create a new project. You may want to have links to certain websites that you use often when writing. You may even want to link to files on your computer, such as, perhaps, a spreadsheet you use for billing clients, or a file you use to keep track of time. Just set up a project with the bookmarks you want to use, then save it as a template, as explained in the article linked above.
Bookmarks are a great way to quickly access the various elements in your binder, and an excellent method for accessing files on your computer that you don’t want to insert into your project. 
Kirk McElhearn is a writer, podcaster, and photographer. He is the author of Take Control of Scrivener, and host of the podcast Write Now with Scrivener.
Cover photo by Markus Winkler